> ## Documentation Index
> Fetch the complete documentation index at: https://docs.frankieone.com/llms.txt
> Use this file to discover all available pages before exploring further.
# Create new entity
## Video Guide
The **Create new entity** screen allows you to input a customer’s personal information and run checks.
## To create a New entity via the Portal
Navigate to the Create new entity form by clicking the **+ New Entity** button.
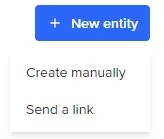 ### Create manually
Select **Create manually** to enter the entity profile details yourself.
### Send a link
Select **Send a link** to send a link to the customer to complete their own profile.
## Creating manually
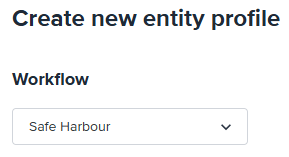
### Select a Workflow
Select the **Workflow** you would like to apply to the new entity profile. This will determine the sequence of checks to accomplish a business process (or a part of it) that's run on this customer.
### Create manually
Select **Create manually** to enter the entity profile details yourself.
### Send a link
Select **Send a link** to send a link to the customer to complete their own profile.
## Creating manually
### Select a Workflow
Select the **Workflow** you would like to apply to the new entity profile. This will determine the sequence of checks to accomplish a business process (or a part of it) that's run on this customer.
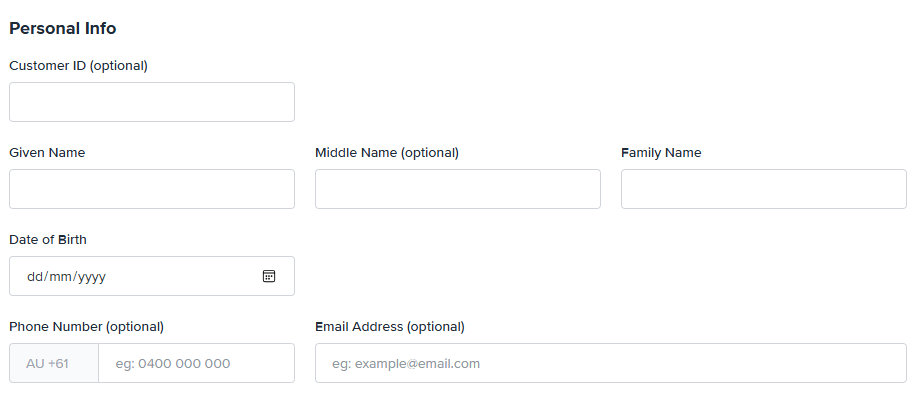
 ### Personal Info
Use the form fields to enter the customer’s personal information. Fields will be optional or required based on the workflow and your FrankieOne configuration.
### Personal Info
Use the form fields to enter the customer’s personal information. Fields will be optional or required based on the workflow and your FrankieOne configuration.
 ### Personal Information Fields
| | |
| :---------------- | :------------------------------------------------------------------------------------------------------------------------------------------------------------- |
| **Customer ID** | *Made up of numbers and or letters and no spacing.*
### Personal Information Fields
| | |
| :---------------- | :------------------------------------------------------------------------------------------------------------------------------------------------------------- |
| **Customer ID** | *Made up of numbers and or letters and no spacing.*
Search by Customer ID using the search bar. |
| **Given Name** | *The customer’s Given Name as shown on their ID document.*
Required field for all customer profiles.
\* Also known as **First Name**. |
| **Middle Name** | *Middle name is an optional field*
Enter a middle name if it's shown on the customer’s ID document. |
| **Family Name** | *The customer’s Family Name as shown on their ID document.*
Also known as **Surname** or **Last Name** |
| **Date of Birth** | - The customer’s Date of Birth |
| **Phone Number** | - Optional field |
| **Email Address** | *Optional field*
Must be a valid email address format |
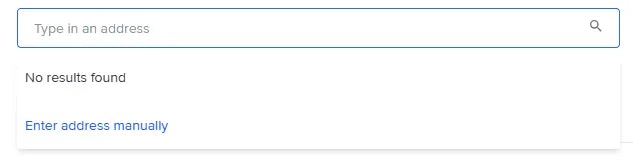
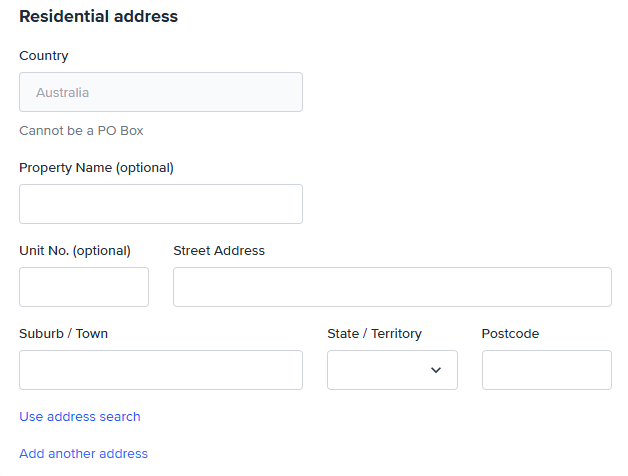
### Residential address
Use the address search field to quickly find an address and populate it into the correct fields.
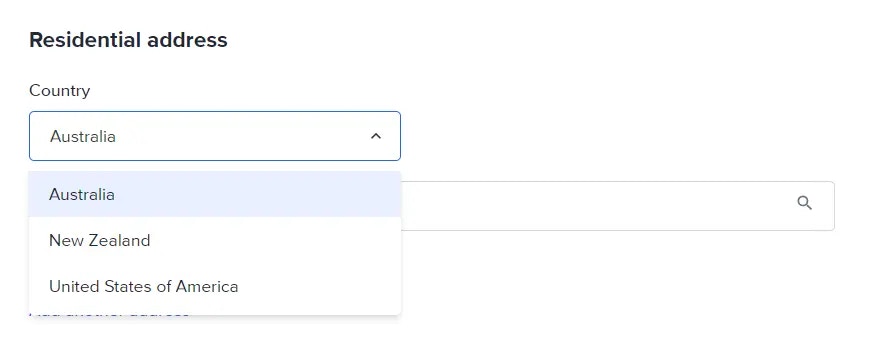 Or select **Enter address manually** to display the individual address fields.
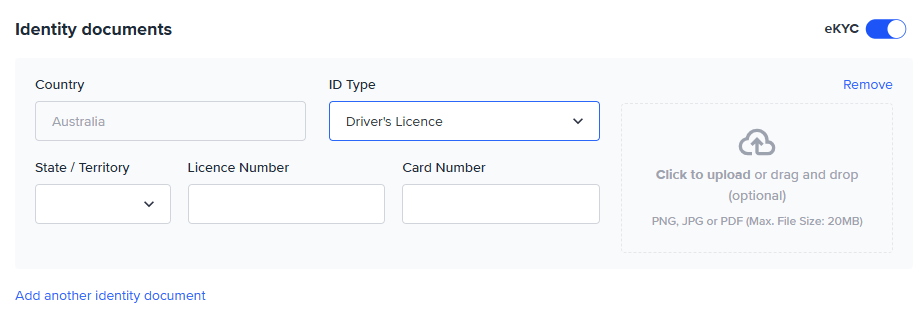
 ### Add an ID Document
Click **Add New Document** to add an ID document to a customer profile.
Different **workflows** will have different requirements for the number and type of ID documents required and this will be set up in your FrankieOne configuration.
Drag and drop to **upload a document scan** or browse and select a file from your computer.
### Add an ID Document
Click **Add New Document** to add an ID document to a customer profile.
Different **workflows** will have different requirements for the number and type of ID documents required and this will be set up in your FrankieOne configuration.
Drag and drop to **upload a document scan** or browse and select a file from your computer.
 ##### Important
FrankieOne keeps every version of an uploaded document, but only the latest version is available in the Portal and API. This design ensures operators make decisions using the most current evidence and avoids confusion that could occur if outdated files were shown, without their related verification results.
Building a full historical view that links each document version to its outcome is not supported today.
If you need to override a decision, always use the latest document, not an older version.
#### Consent
You must obtain **Consent** from your customer as per the **AML/CTF** act to run certain checks. You won't be able to save and verify where consent is required as part of the selected **Workflow.**
##### Important
FrankieOne keeps every version of an uploaded document, but only the latest version is available in the Portal and API. This design ensures operators make decisions using the most current evidence and avoids confusion that could occur if outdated files were shown, without their related verification results.
Building a full historical view that links each document version to its outcome is not supported today.
If you need to override a decision, always use the latest document, not an older version.
#### Consent
You must obtain **Consent** from your customer as per the **AML/CTF** act to run certain checks. You won't be able to save and verify where consent is required as part of the selected **Workflow.**
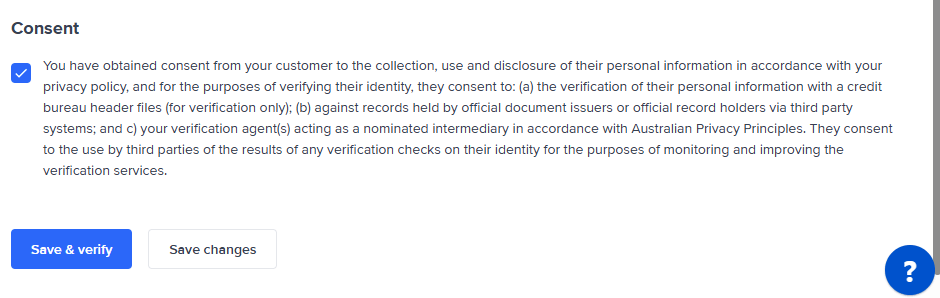 ### Save & verify
Selecting **Save & verify** will save the changes to the profile and run all of the checks required as per the selected workflow. If checks have been run previously, FrankieOne will decide which, if any, further checks need to be run and which don't need to be run again.
#### Save Changes
Selecting **Save changes** will save changes to the profile and any new information or information that has been changed after checks have already been run will show as **Unchecked**.
If changes were made that don't impact the result of previous checks, these results will remain.
If a new ID document has been added and saved, and a different ID document has previously passed, the original document will remain as passed.
## Send link to create
If you selected **Send a link** when creating a new entity, you will be prompted to enter the customer’s details.
Instead of typing every detail yourself, you can text an onboarding link to the customer.
The customer opens the link, uploads their ID and selfie, and the Portal updates the profile automatically.
### Save & verify
Selecting **Save & verify** will save the changes to the profile and run all of the checks required as per the selected workflow. If checks have been run previously, FrankieOne will decide which, if any, further checks need to be run and which don't need to be run again.
#### Save Changes
Selecting **Save changes** will save changes to the profile and any new information or information that has been changed after checks have already been run will show as **Unchecked**.
If changes were made that don't impact the result of previous checks, these results will remain.
If a new ID document has been added and saved, and a different ID document has previously passed, the original document will remain as passed.
## Send link to create
If you selected **Send a link** when creating a new entity, you will be prompted to enter the customer’s details.
Instead of typing every detail yourself, you can text an onboarding link to the customer.
The customer opens the link, uploads their ID and selfie, and the Portal updates the profile automatically.
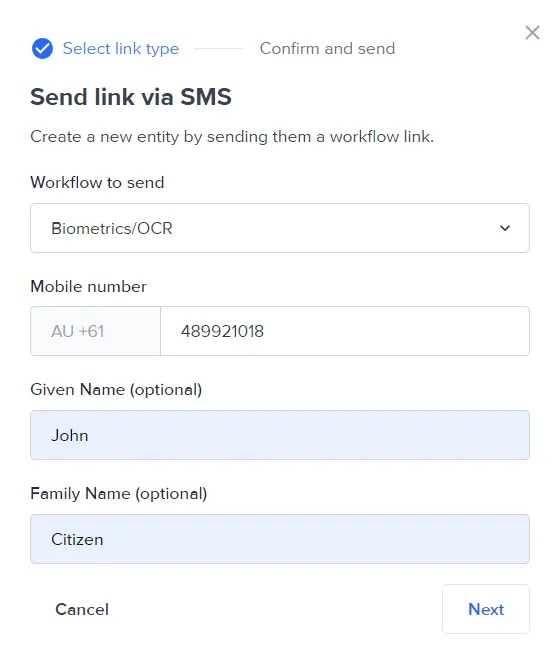 ### 1. Enter phone number and name
In the **Send link** modal, type the customer’s
* **Phone number** (include country code).
* **Given name** and **Family name** (optional but helps match results).
The phone number becomes the **Customer reference (Cust ref)** for easy searching later.
### 2. Choose the onboarding workflow
Select the **Workflow to send** from the drop-down.
Common options include **Biometrics/OCR** or **OCR only**.
### 3. Click **Next** – Choose Send Link or Copy Link
### 1. Enter phone number and name
In the **Send link** modal, type the customer’s
* **Phone number** (include country code).
* **Given name** and **Family name** (optional but helps match results).
The phone number becomes the **Customer reference (Cust ref)** for easy searching later.
### 2. Choose the onboarding workflow
Select the **Workflow to send** from the drop-down.
Common options include **Biometrics/OCR** or **OCR only**.
### 3. Click **Next** – Choose Send Link or Copy Link
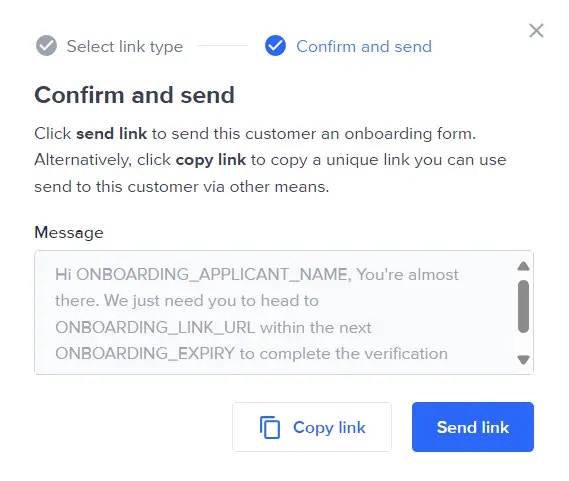 | Option | What happens |
| :------------ | :----------------------------------------------------- |
| **Send link** | Sends an SMS immediately. |
| **Copy link** | Copies the URL so you can paste it into email or chat. |
If you select **Copy link**, a notification will appear to confirm the link is copied.
| Option | What happens |
| :------------ | :----------------------------------------------------- |
| **Send link** | Sends an SMS immediately. |
| **Copy link** | Copies the URL so you can paste it into email or chat. |
If you select **Copy link**, a notification will appear to confirm the link is copied.
 ### 4. After you send the link
* The entity is **automatically assigned to you** for easy follow-up.
* The **phone number appears as the Cust ref** in the entity record.
* The profile status shows **Unchecked** until the customer finishes.
A notification will appear to confirm the link is sent.
### 4. After you send the link
* The entity is **automatically assigned to you** for easy follow-up.
* The **phone number appears as the Cust ref** in the entity record.
* The profile status shows **Unchecked** until the customer finishes.
A notification will appear to confirm the link is sent.
 ### Finding an incomplete entity
1. Use the **Search bar** at the top of the Portal page.
2. Select **Customer Ref** from the drop-down.
3. Paste or type the **Cust ref** (customer’s phone number).
4. Press **Enter** to open the profile.
### Resending a link
If the customer’s link expired or they had trouble:
1. Open the entity and go to **Workflow events**.
2. Click the **Send link** icon again.
3. Confirm the phone number (edit if needed) and press **Send**.
### Finding an incomplete entity
1. Use the **Search bar** at the top of the Portal page.
2. Select **Customer Ref** from the drop-down.
3. Paste or type the **Cust ref** (customer’s phone number).
4. Press **Enter** to open the profile.
### Resending a link
If the customer’s link expired or they had trouble:
1. Open the entity and go to **Workflow events**.
2. Click the **Send link** icon again.
3. Confirm the phone number (edit if needed) and press **Send**.