> ## Documentation Index
> Fetch the complete documentation index at: https://docs.frankieone.com/llms.txt
> Use this file to discover all available pages before exploring further.
# Managing Your Azure SAML Single Sign-On (SSO) Setup
## Prerequisites
Ensure you’ve obtained your metadata from FrankieOne for your environment.
## Procedure
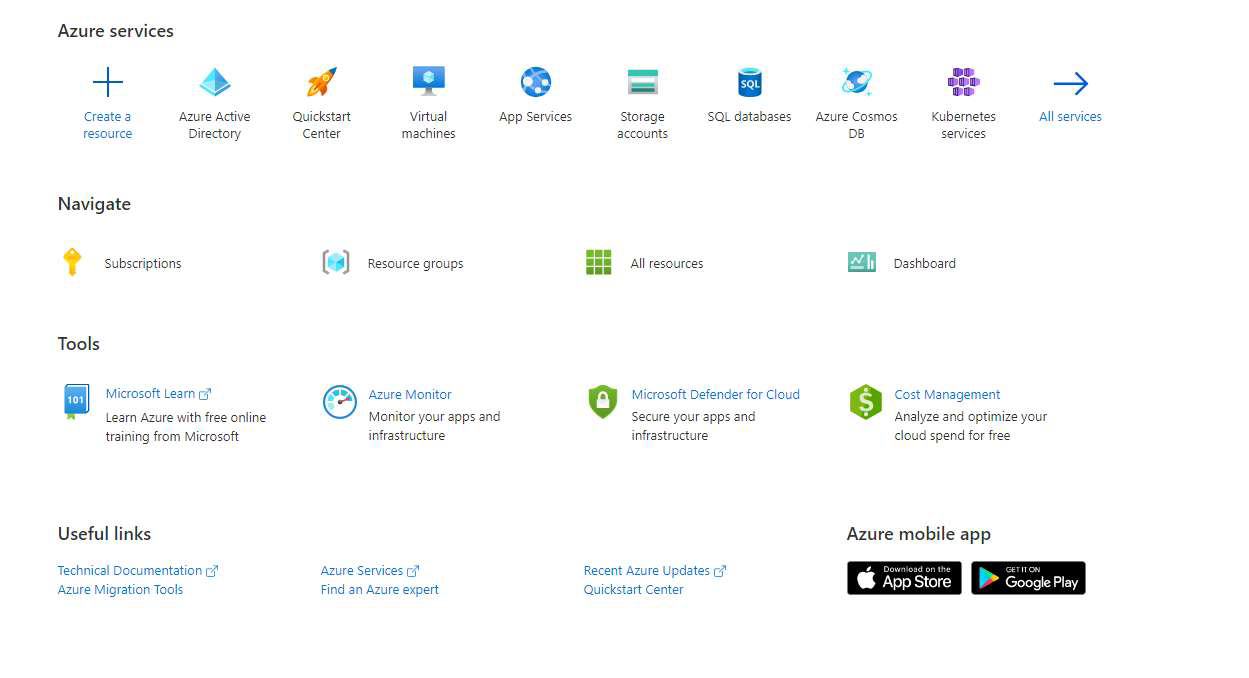
1. Sign in to your Azure Portal and navigate to **Azure Active Directory**.
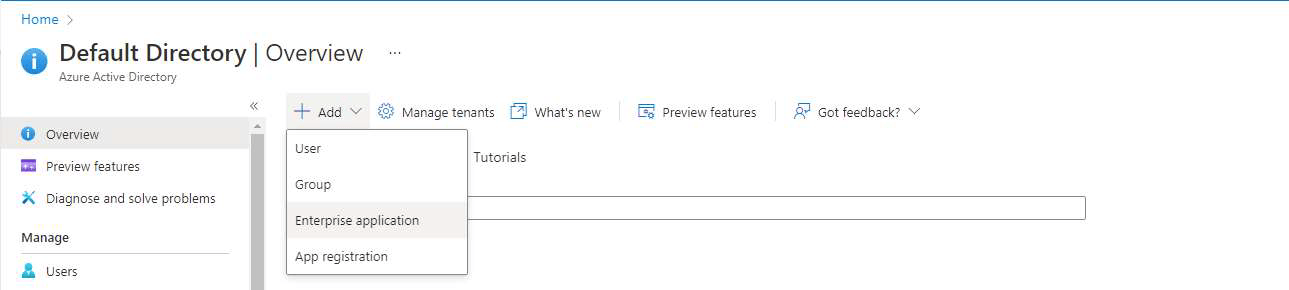
 2. In the **Overview** section, select **New** , then choose **Add Enterprise Application**.
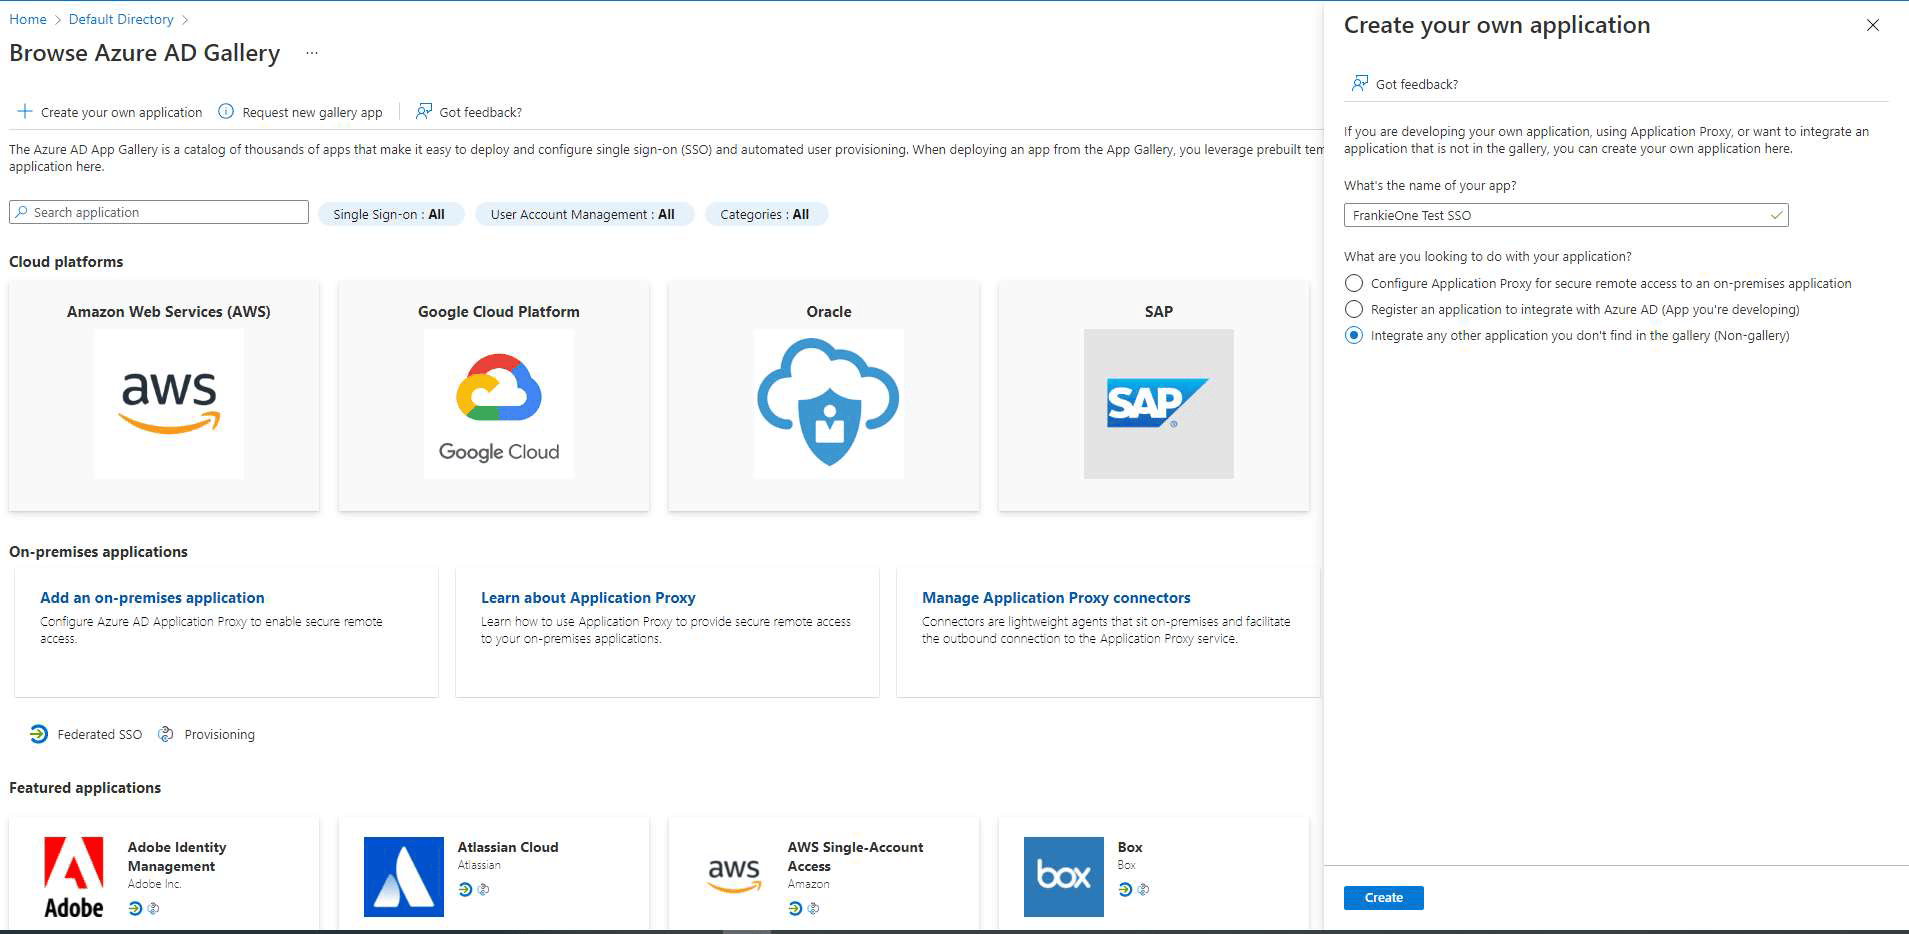
 3. Select **Create Own Application** , provide a suitable name, choose the **Integrate any other application you don’t find in the gallery** option, and then select **Create**.
 For this exercise, we’ll assume you already have users in your Active Directory (AD) account and won’t cover the process of creating users and assigning access to this application.
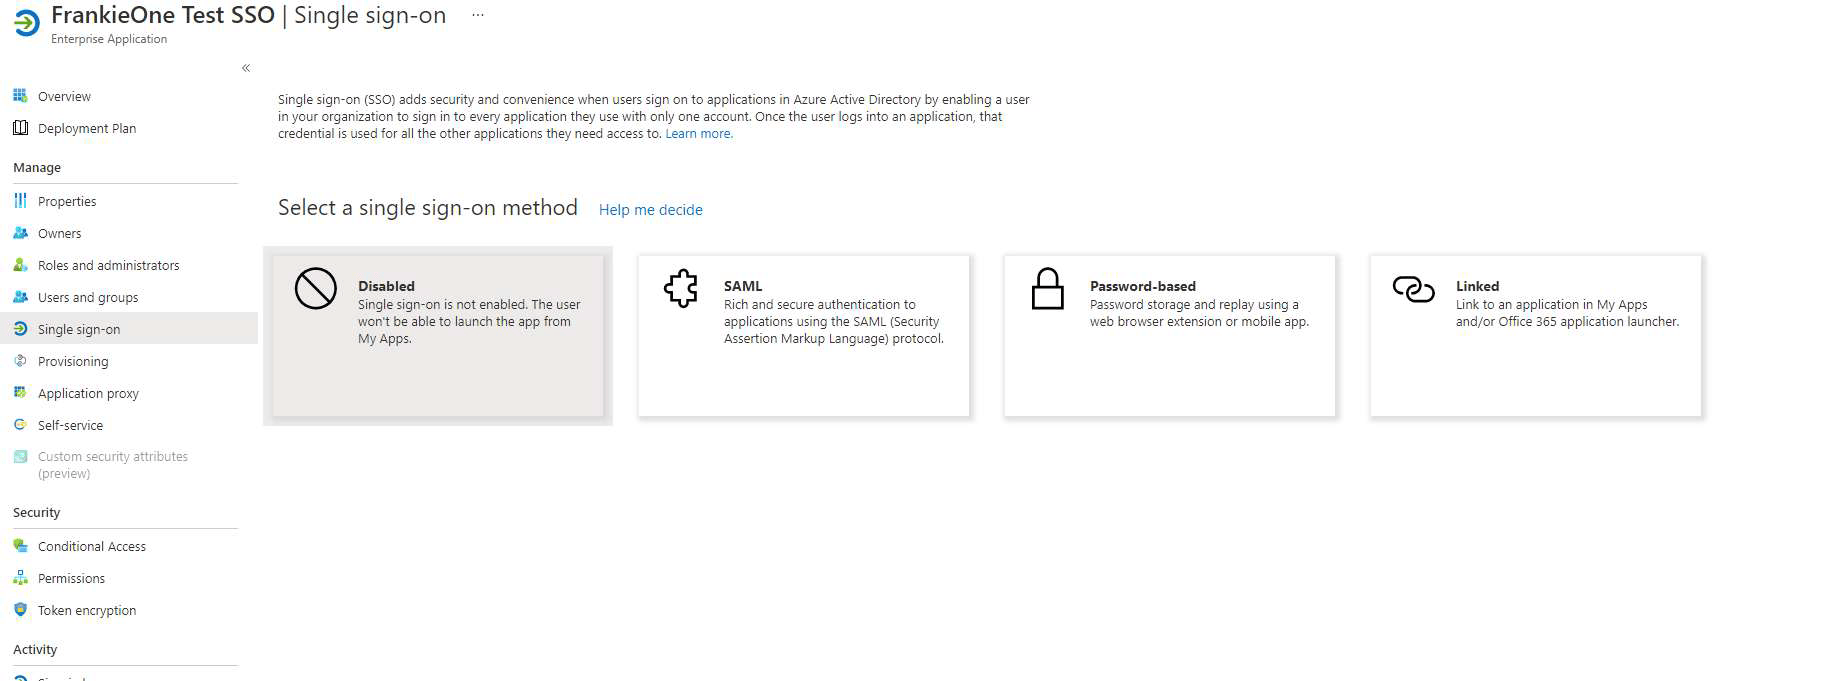
4. On the **Get Started** page of the newly created application, select the **Set up Single Sign-On option** (option 2 in the image below).
For this exercise, we’ll assume you already have users in your Active Directory (AD) account and won’t cover the process of creating users and assigning access to this application.
4. On the **Get Started** page of the newly created application, select the **Set up Single Sign-On option** (option 2 in the image below).

 When prompted for the Single Sign-On method, choose **SAML**.
 5. Select **Upload Metadata** file to have Azure pre-fill some sections for you.
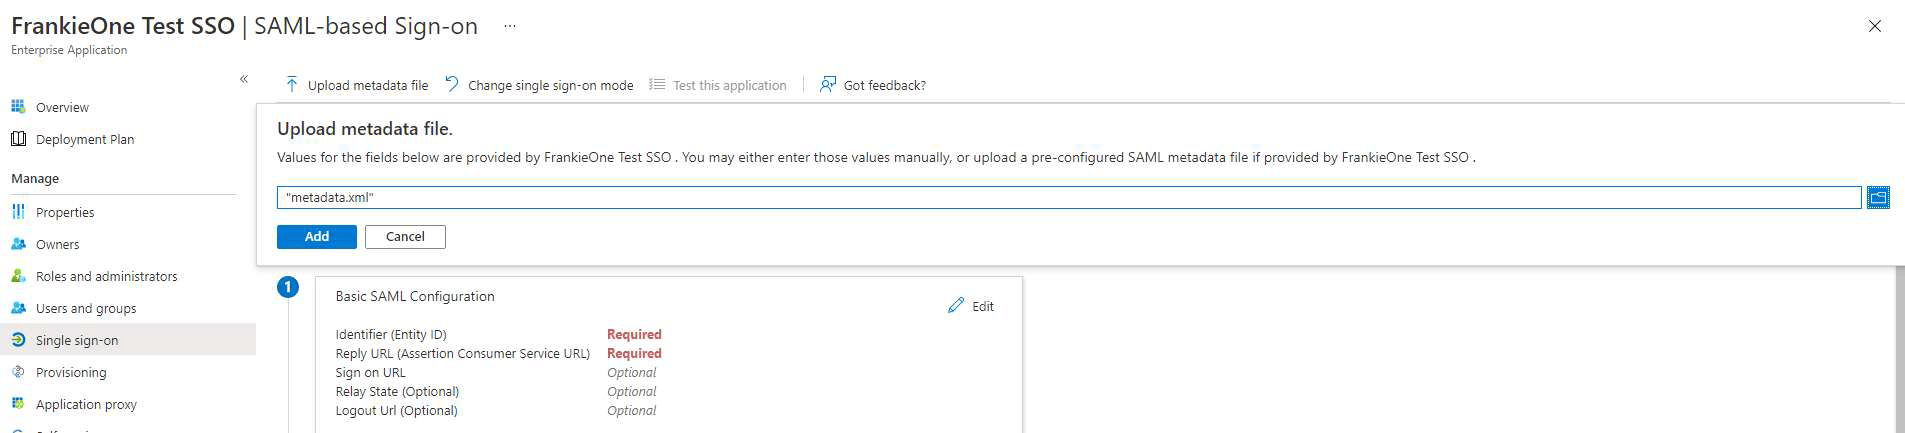 The details below will auto-fill once the data has been passed into Azure. Select Save to proceed.
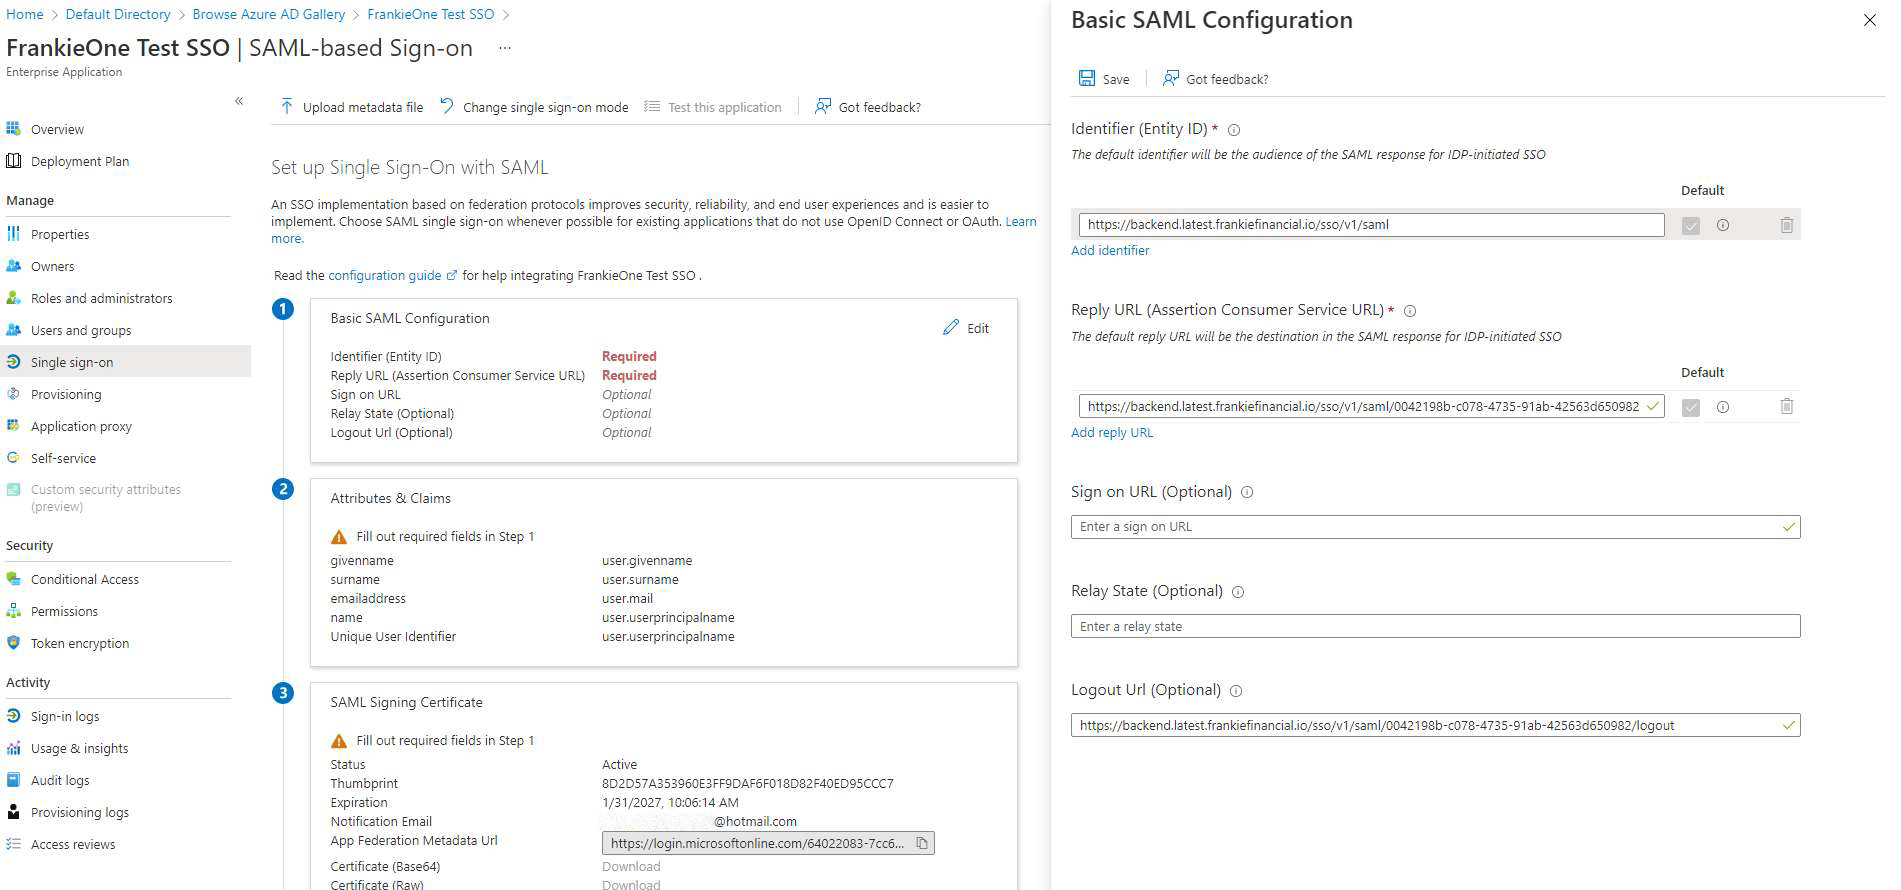 6. Select Attributes & Claims and add the following attributes to be passed on to FrankieOne:
* Email
* fullName
* roles (Available from [here](/docs/v1/portal/sso-setup))
* After completing the above step, the attributes section of your SSO might look like the image below.
After completing the above step, the attributes section of your SSO might look like the image below.
6. Select Attributes & Claims and add the following attributes to be passed on to FrankieOne:
* Email
* fullName
* roles (Available from [here](/docs/v1/portal/sso-setup))
* After completing the above step, the attributes section of your SSO might look like the image below.
After completing the above step, the attributes section of your SSO might look like the image below.
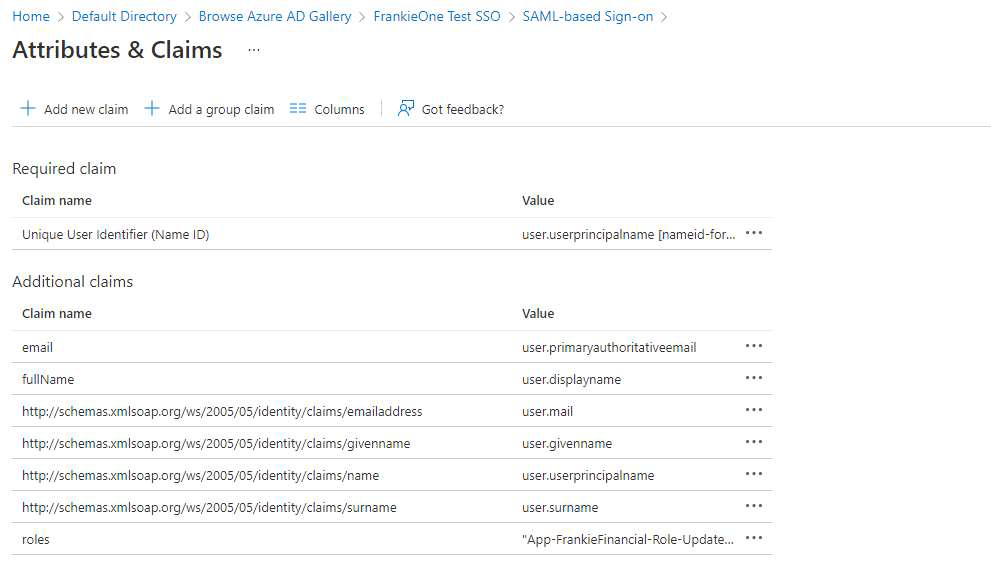 The Roles claim should be a comma-separated list of roles currently available in your portal. To manage users with different permissions, the value should be conditional and based on group assignment. See the image below showing how groups have been used to assign roles.
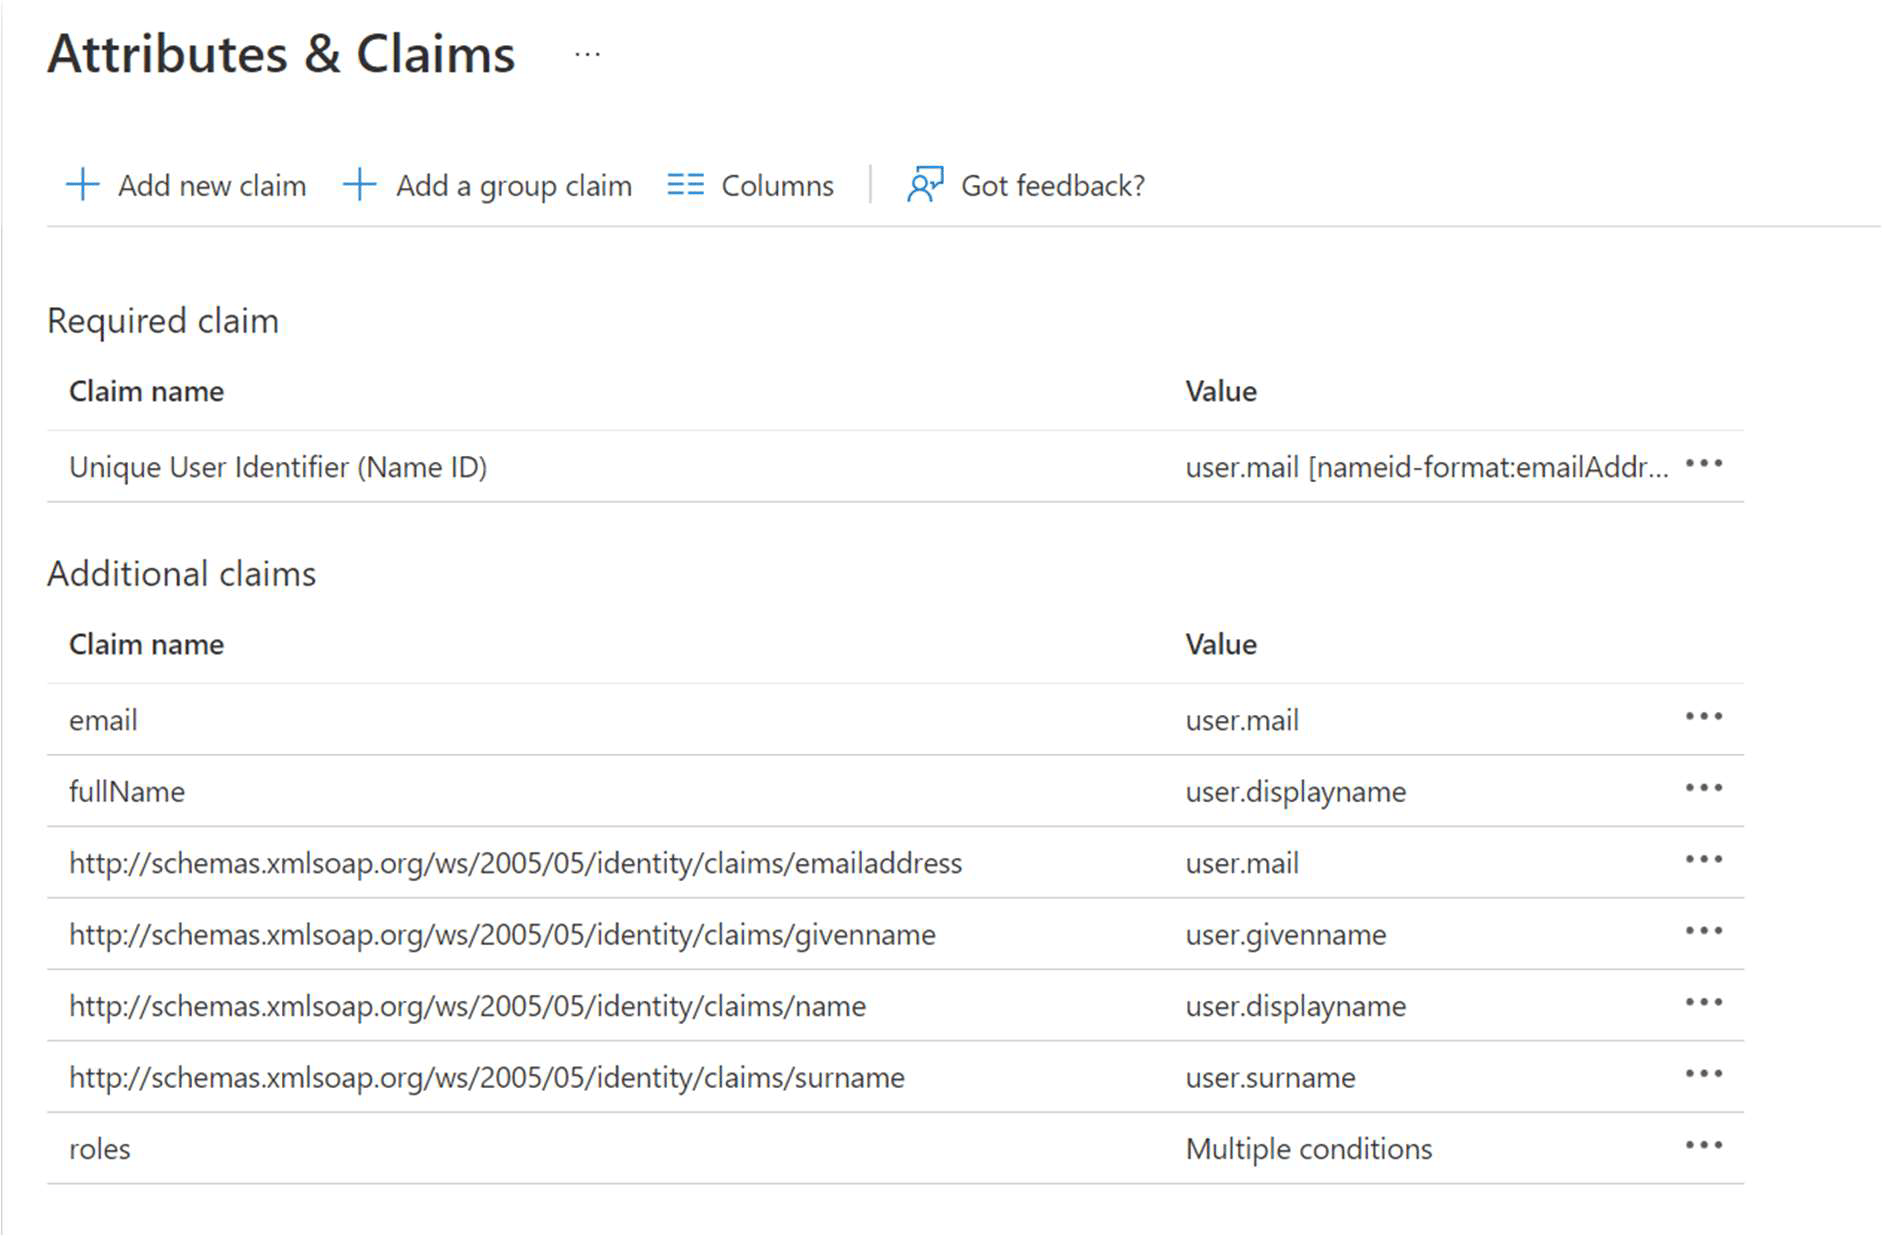
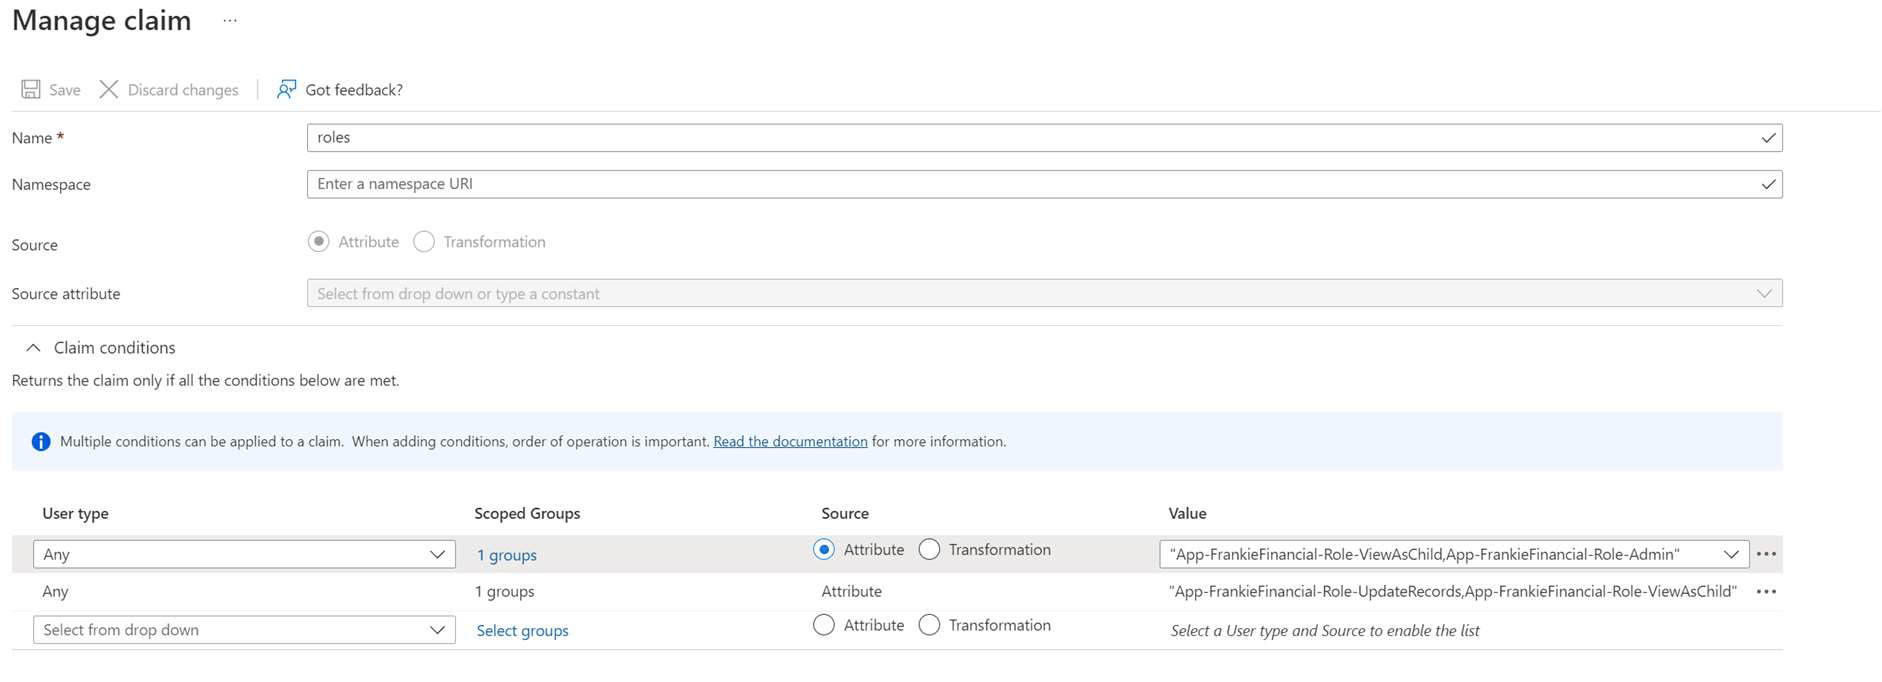 The group names aren’t passed to FrankieOne, only the comma-separated list of data you’ve entered in the “values” section.
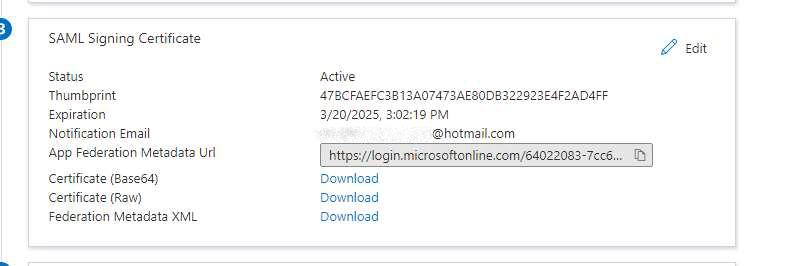
After you’ve configured this, download the Federation Metadata XML and provide it to FrankieOne to complete the setup.
The group names aren’t passed to FrankieOne, only the comma-separated list of data you’ve entered in the “values” section.
After you’ve configured this, download the Federation Metadata XML and provide it to FrankieOne to complete the setup.
 Once you receive confirmation from FrankieOne about setting up your SSO, you can test the SSO login. You might want to add users into the application itself, depending on how Azure has been configured for Access to Applications.