OneSDK Implementation Guide
This guide provides a conceptual overview of OneSDK integration with basic code examples. The code snippets shown are illustrative and need to be adapted into your specific framework and application architecture. For complete, working examples:
- See our Framework Integration Guides for Angular, React, Vue.js, Next.js and other frameworks
- Visit our GitHub repository for extensive sample code and reference implementations
- Check out our Hosted Implementation Examples for end-to-end solutions hosted by FrankieOne
Core Modules Overview
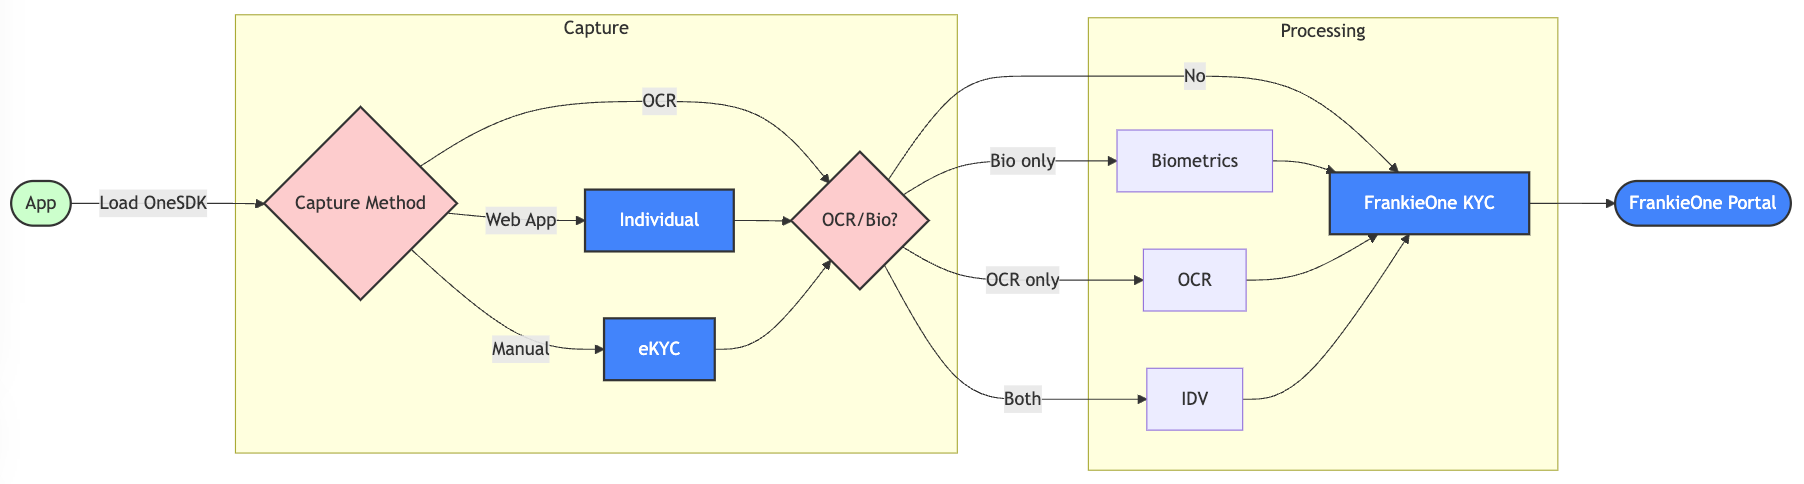
Complete KYC workflow for individual verification, including document handling, address verification, and profile management.
Advanced biometric verification capabilities including facial recognition, liveness detection, and matching.
Intelligent document scanning and data extraction for IDs, passports, and other verification documents.
Comprehensive identity document verification with support for multiple document types across jurisdictions.
Customizable electronic Know Your Customer forms with built-in validation and compliance checks.
Real-time fraud prevention and detection across multiple risk vectors.
OneSDK Modules Data Capture Flow
Quick Integration Guide
Each module can be used independently or as part of a comprehensive verification flow. Check individual module documentation for detailed implementation guidelines.
Content Security Policy (CSP) Settings
You may need to adjust your Content Security Policy (CSP) settings to allow vendors’ scripts and resources to load correctly. Below are the additional CSP rules required based on the vendor you are integrating with: