FrankieOne Single Sign-On (SSO) with Okta
Prerequisites
Ensure you’ve obtained the metadata from FrankieOne for your environment.
Procedure
-
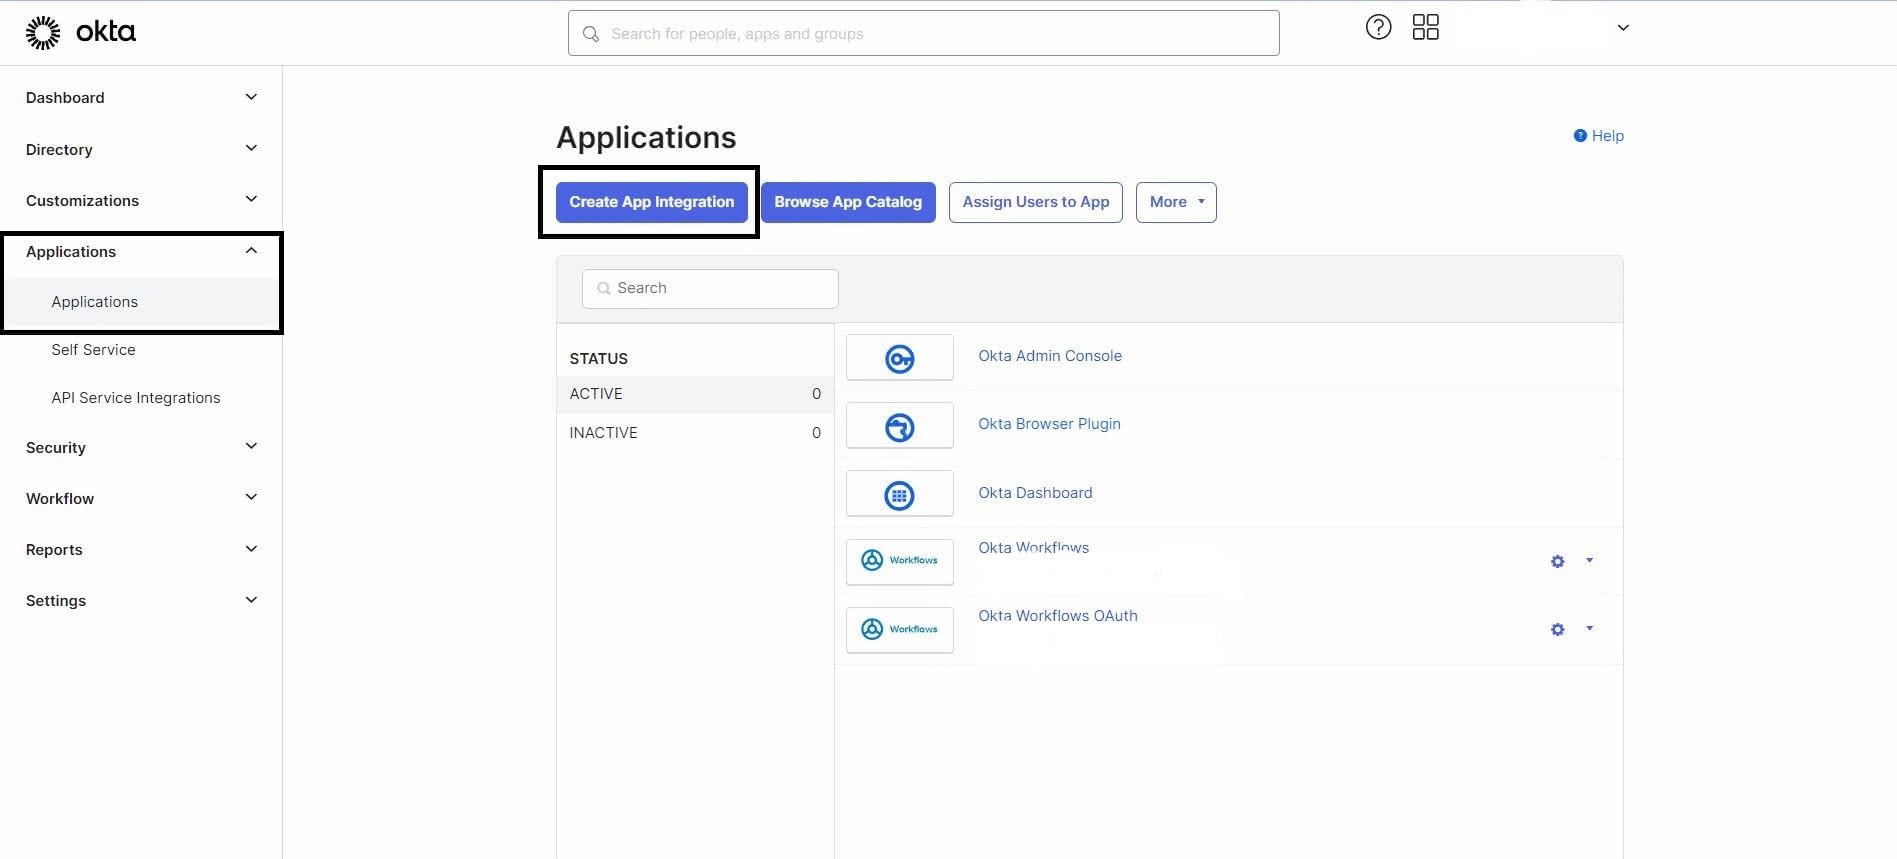
Navigate to the Okta Admin Dashboard > Applications > Applications > Create App Integration.
-
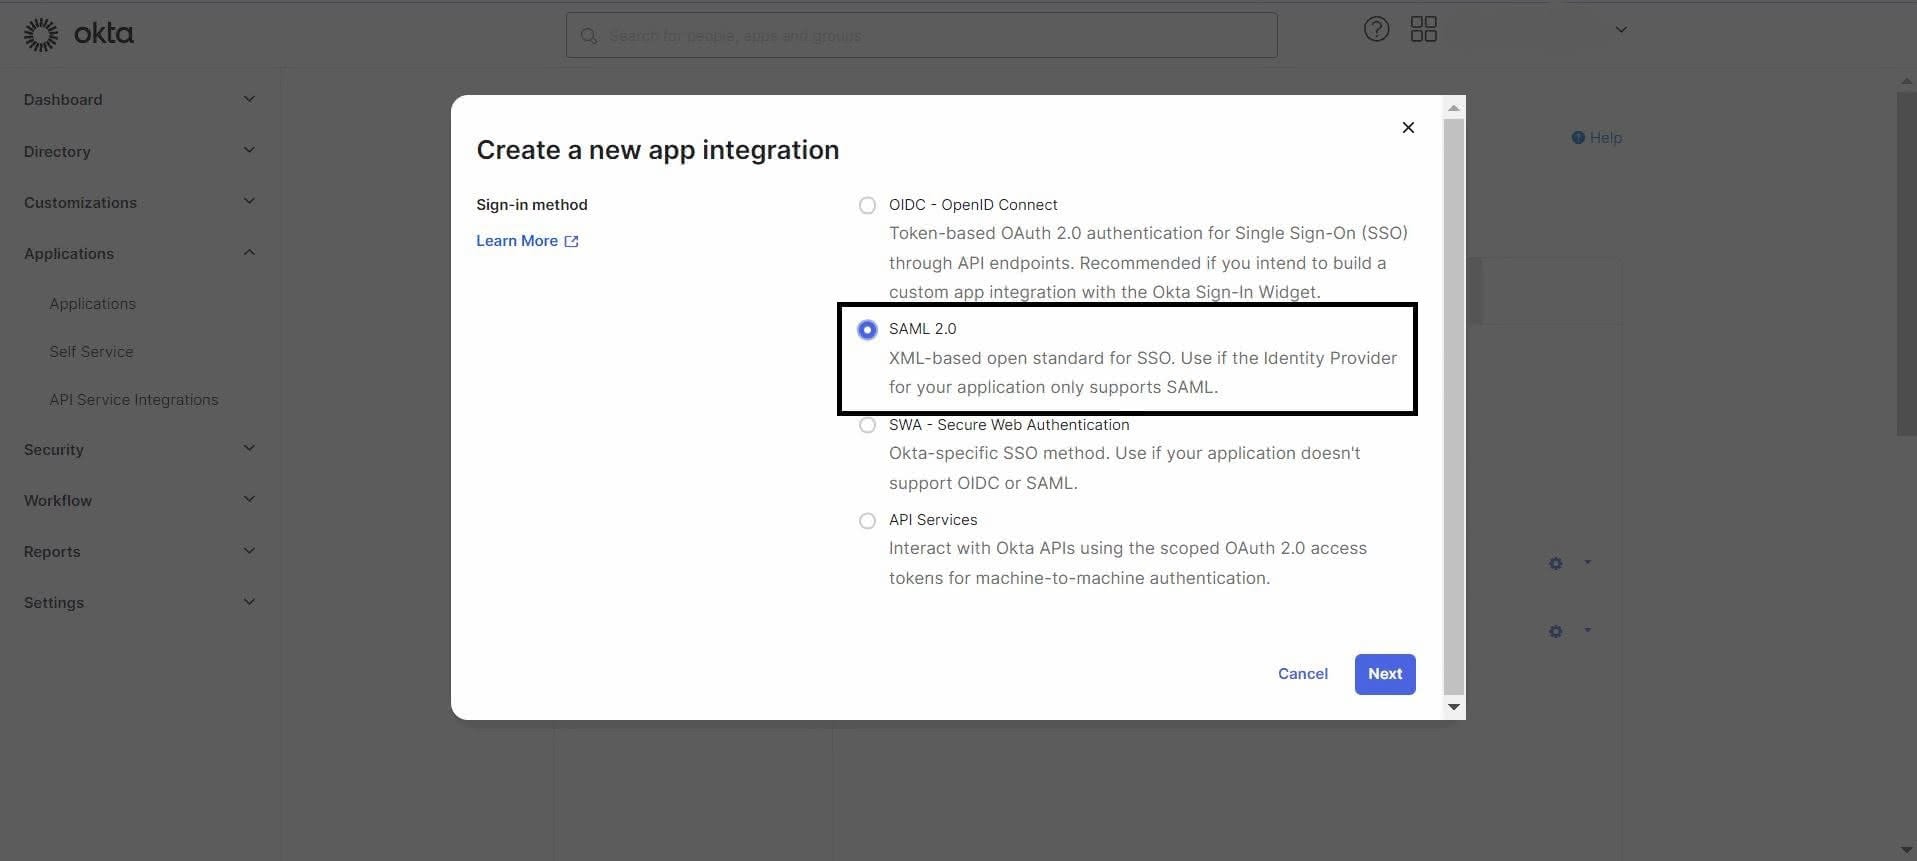
Choose the SAML 2.0 option and select Next.
-
In the** General Settings** tab, assign a name to your application and select Next.

-
In the Configure SAML tab, use the metadata provided by FrankieOne to fill in the details under the General section as follows:

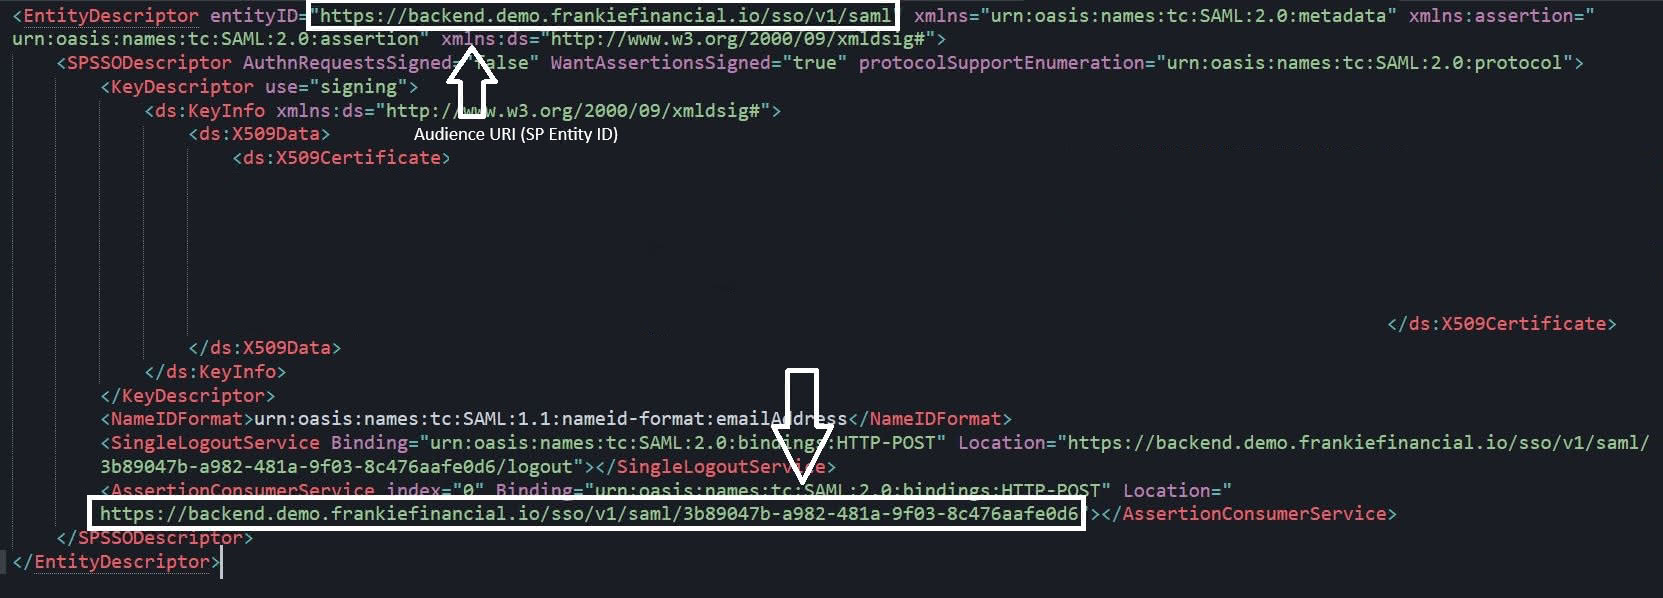
- Single sign-on URL:
<AssertionConsumerService.Location value from the metadata> - Audience URL (SP Entity ID):
<EntityDescriptor.entityID value from the metadata> - Default RelayState:
<Leave it blank> - Name ID format: Choose
Emailaddressfrom the drop-down options. - Application username: Choose
Okta usernamefrom the drop-down options. - Update application username on: Choose
Create and updatefrom the drop-down options.
- Single sign-on URL:
-
In the Attribute Statements (optional) section, add attributes as shown in the screenshot.
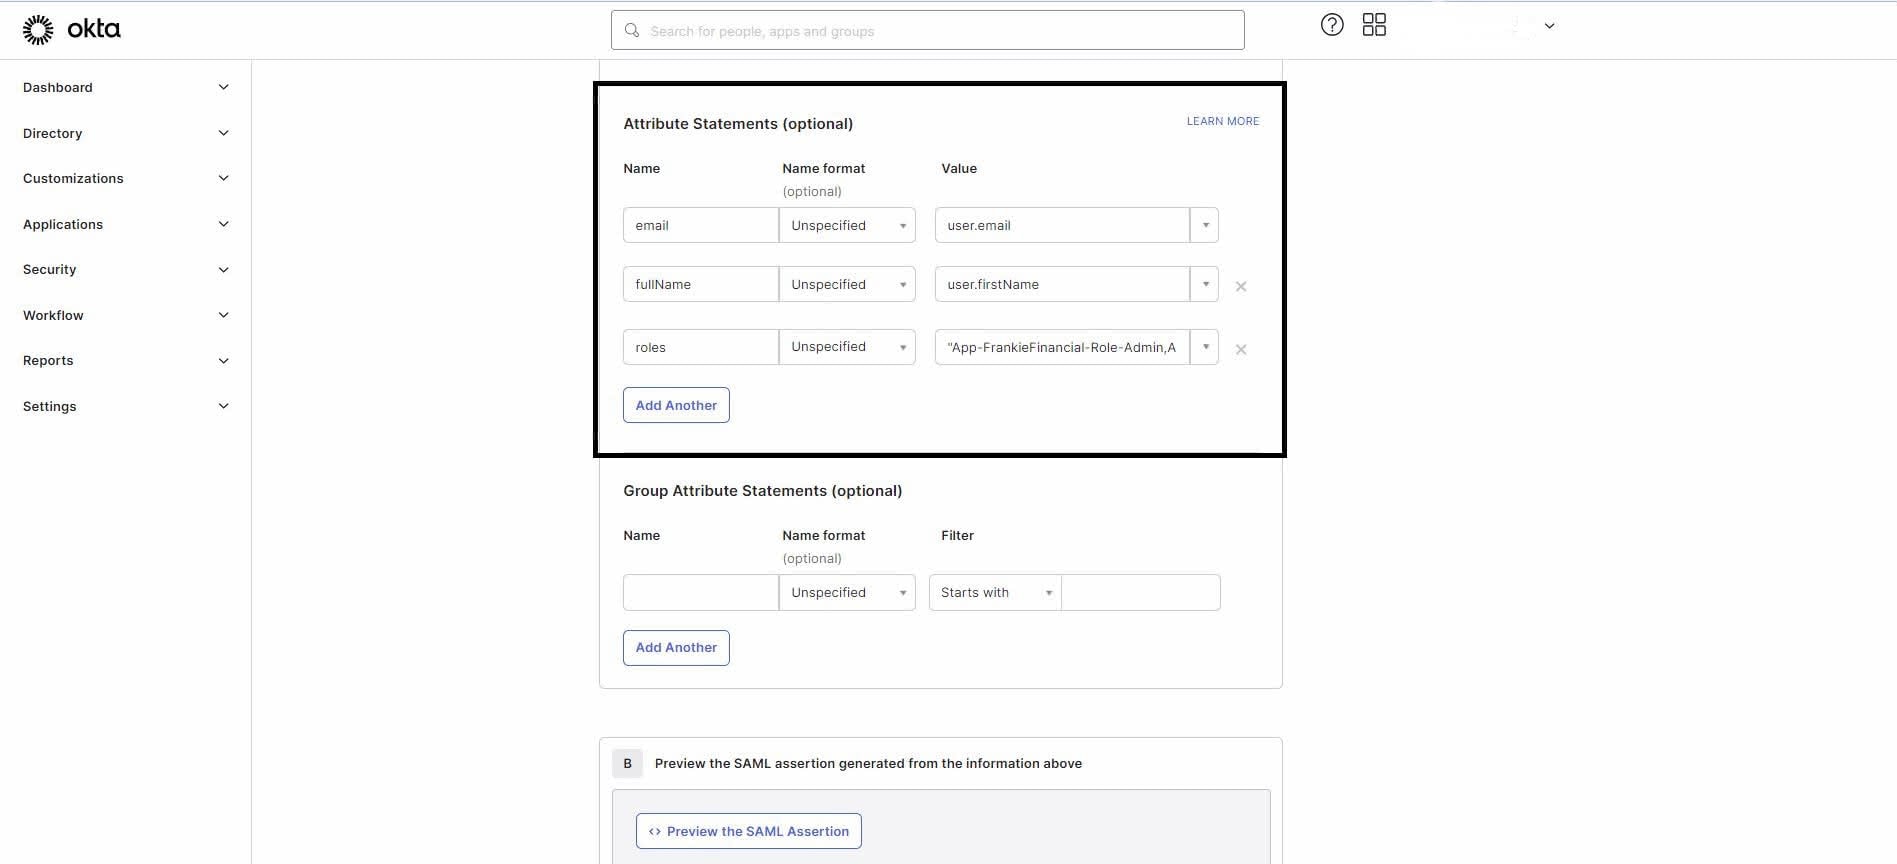
Note: All three attributes shown in the screenshot are mandatory. The “roles” attribute can have multiple values separated by a comma and enclosed in double quotes.
-
Select Next, then go to the Feedback tab, where you can choose the appropriate option based on your setup.
-
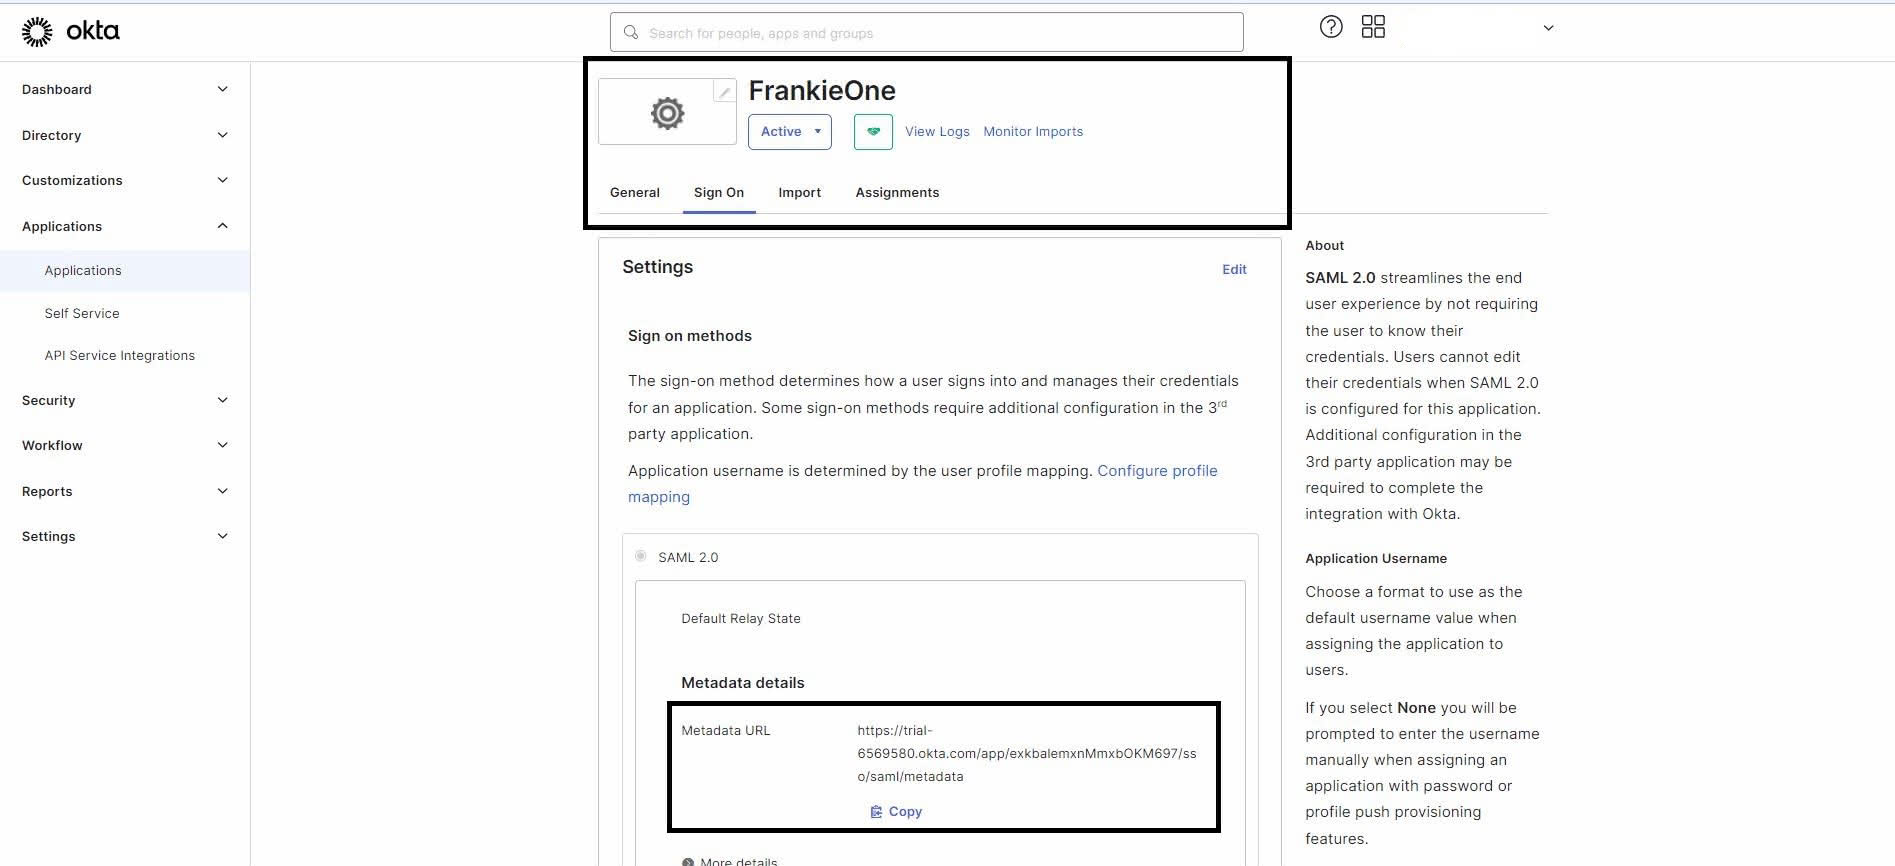
After creating the application, you’ll see the application’s** Sign On** settings page, which includes the link to the metadata. Share this metadata with us (FrankieOne) to complete the SSO setup.
Notes
-
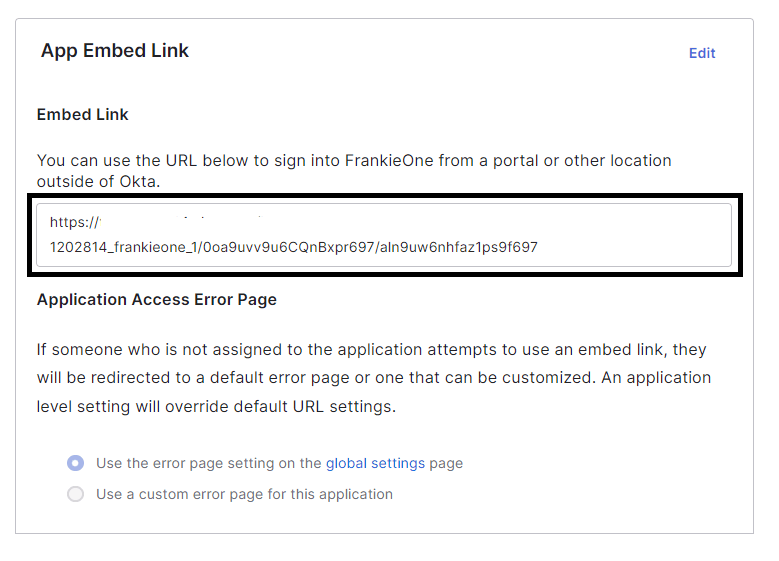
You can access the FrankieOne Portal using the App Embed Link available under the General tab on the application’s home page.
-
If end users encounter permission errors from Okta, assign the respective users to this newly created application.
