Instead of building from scratch, you can fork an existing flow from the public sample codes.
Prerequisites
- A Customer ID and API Key from the FrankieOne portal
- A backend endpoint that can generate session tokens (or use the inline fetch shown below for development only)
- Node.js 16+ (for the React example)
Architecture
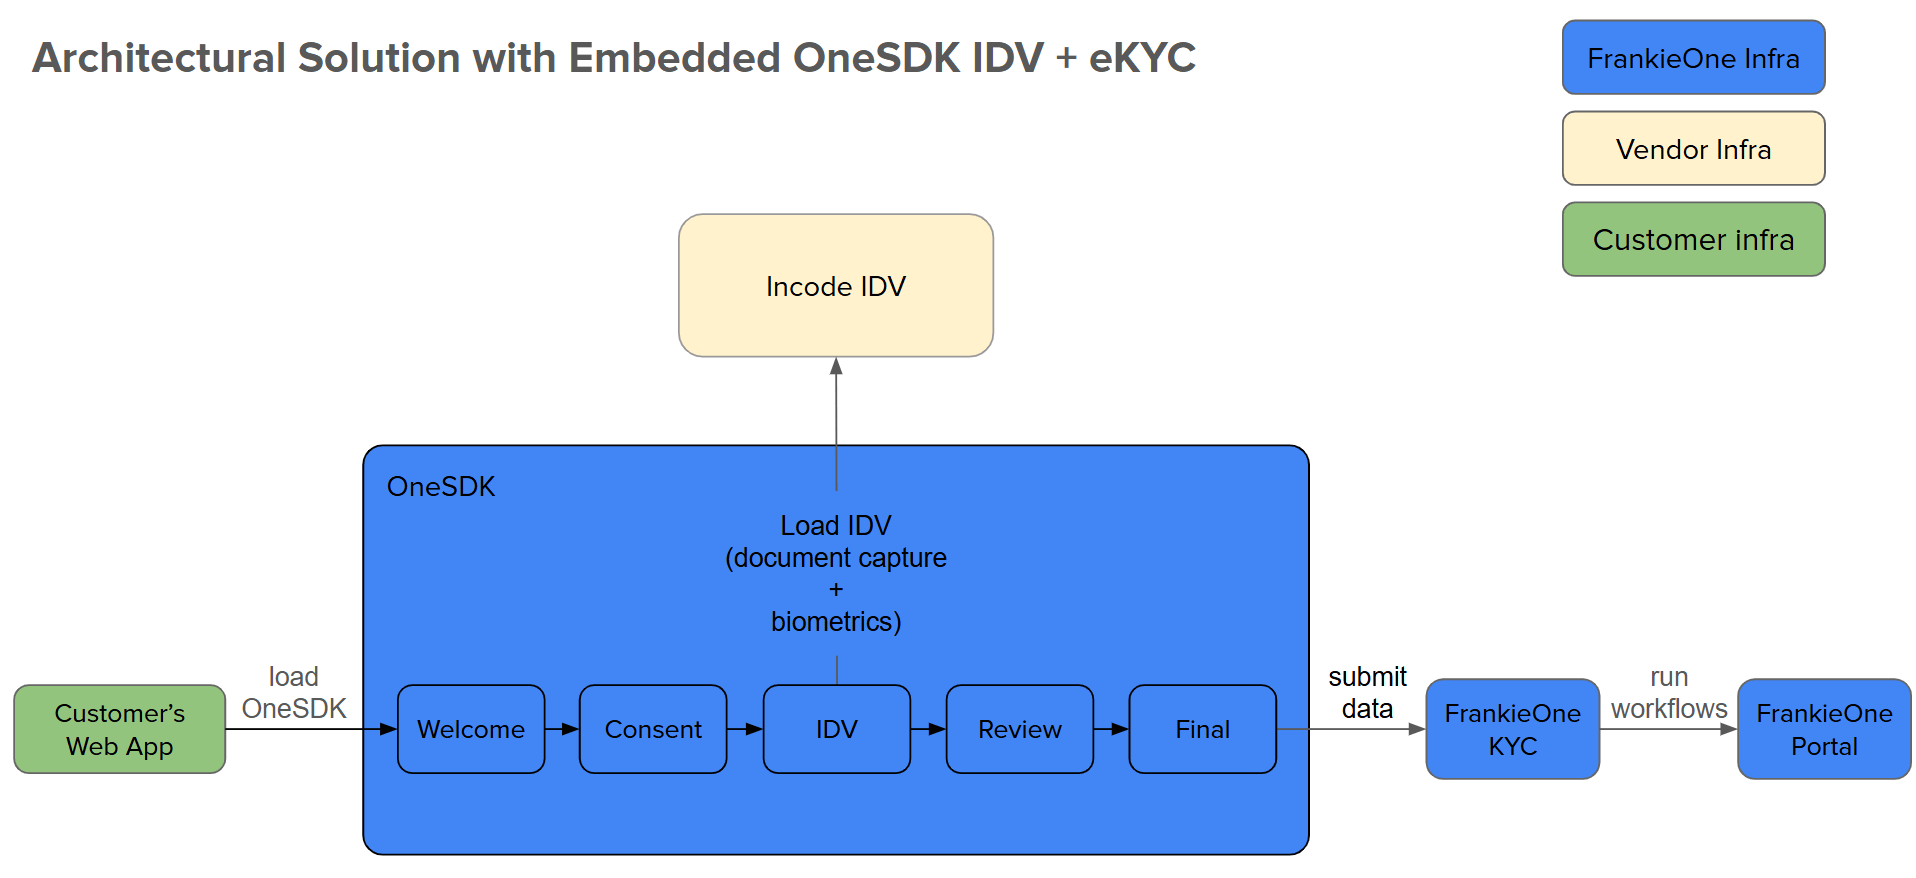
Component Flow
Component Flow
- Customer Web App — your application hosting OneSDK
- OneSDK — manages the verification UI/UX
- Incode IDV — handles document and biometric capture
- FrankieOne KYC — processes verification checks
- Portal — displays verification results
Full Implementation
- Vanilla HTML/JS
- React
Copy this into an
.html file and open it in a browser. Replace the placeholder credentials with your own.Step-by-Step Breakdown
1. Generate a Session Token
Your backend calls the/auth/v2/machine-session endpoint with your credentials and returns the session object to the frontend. See Session Management for details.
2. Initialize the SDK
Pass the session object toOneSDK() along with configuration options like mode and recipe. Include the recipe.form.provider configuration for the WELCOME and CONSENT screens.
3. Add Welcome and Consent Screens
Create WELCOME and CONSENT form components to collect user consent before starting verification. Consent must be collected before the IDV flow can proceed.4. Create a Flow or Component
Usesdk.flow("idv") to create an IDV flow, or create individual components like sdk.component("ocr") for more granular control.
5. Wire Up Events
Listen for events likeform:welcome:ready, form:consent:ready, results, error, and loading to drive your UI transitions.
6. Mount to the DOM
Call.mount("#onesdk-container") on the welcome screen to start the flow. Each subsequent screen is mounted by event listeners.
Next Steps
eKYC Flow
Manual form-based KYC with document collection and fraud detection.
IDV Flow
Camera-based identity document verification with minimal setup.
IDV with Review
IDV flow with OCR review screen for data verification.
Split Flow
Separate OCR and Biometrics components for maximum control.
OCR Only
Document capture and data extraction without biometrics.
Document Upload
File-based document collection with upload screens.
Additional Resources
Sample Code
Browse reference implementations.
Live Demo
Try OneSDK in an interactive environment.
Test Data
Get test credentials and sample data.
Troubleshooting
Token Generation Failed
Token Generation Failed
- Verify your Customer ID and API Key in the
.envfile - Check network connectivity to the FrankieOne API
- Ensure you are using the correct endpoint (UAT vs production)
Component Not Rendering
Component Not Rendering
- Confirm the mount target element exists in the DOM (e.g.,
#onesdk-container) - Check the browser console for initialization errors
- Verify the session token has not expired
Best Practices
Best Practices
- Always generate session tokens on your backend — never expose API keys in client code
- Implement error handling for all SDK operations
- Use test data during development