Account Configuration Required
To use device characteristics and behavioral biometrics, your account must be configured by FrankieOne. Contact your Customer Success representative to enable these features.Implementation Overview
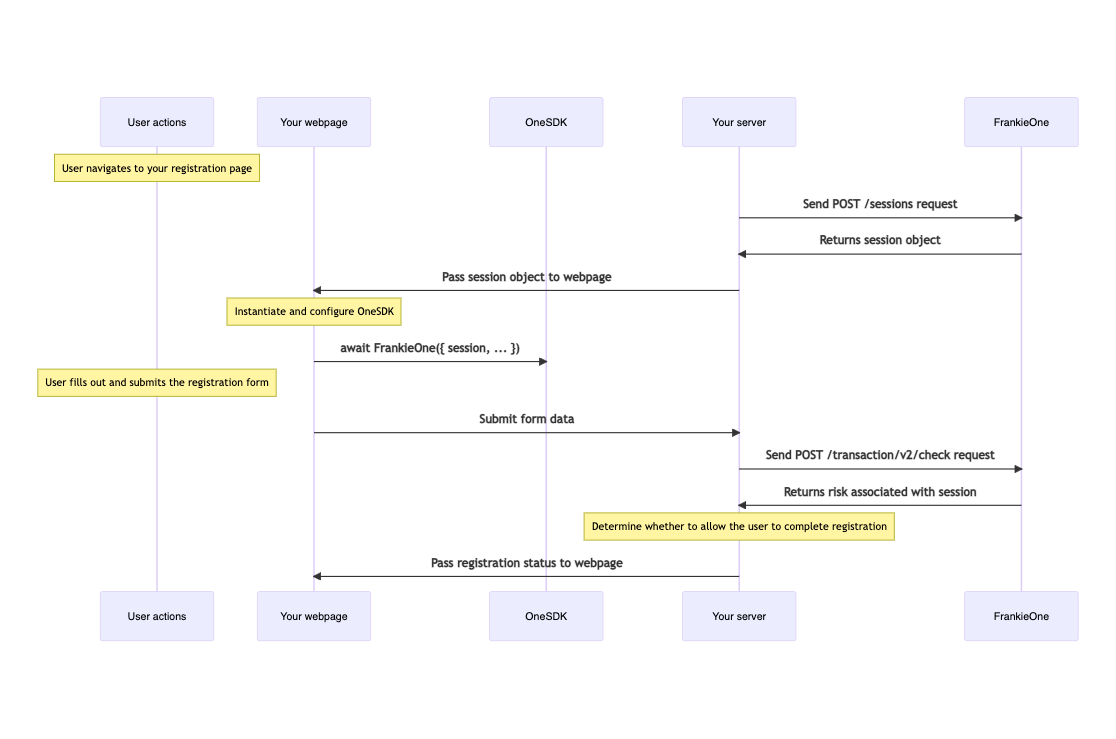
Integration Steps
1
Initialize Server-Side Session
Your server needs to create a temporary session before serving the frontend.
Note: The sample code below is just an example. Never generate tokens on the frontend — doing so can expose your credentials. Always generate tokens securely on your backend and pass them to your app as needed.
2
Initialize OneSDK with Device Characteristics module
Set up OneSDK with the provided session data.
3
Retrieve Fraud Indicators
You can check entity’s fraud indicator from Portal, or via KYC Entity Risk endpoint, read more here.
Using Sardine
Initialization
Once you have initialized OneSDK instance, you can create a device check component Setting up Device CheckCapture Phone and Email for Fraud check
Using Individual’s module to capture phone number and email, OneSDK will also allow you to run Fraud checks on these details.Event System
Core Events
Core Events
mount
Emitted when Device Characteristics component is successfully mounted
mount error
Signals unsucessful mount
Best Practices
Performance Optimization
Performance Optimization
- Initialize OneSDK as early as possible in your application lifecycle
- Keep the session object readily available in your frontend state
- Consider implementing session recovery mechanisms
Security Considerations
Security Considerations
- Never expose your FrankieOne API credentials in the frontend
- Implement proper session timeout handling
- Always validate session data on your server
Risk Level Handling
Low Risk
Standard processing
- Continue with normal flow
- Regular verification
Medium Risk
Enhanced verification
- Additional identity checks
- Manual review option
High Risk
Restricted processing
- Block registration
- Flag for review