Video Guide
Introduction
Fraud Prevention & Risk-Based Onboarding lets you screen every applicant during onboarding by analyzing device, email, and phone signals in real time. The API works with FrankieOne oneSDK to gather silent risk indicators and trigger additional checks only when needed, helping you:- Block fraudulent sign-ups before they reach KYC
- Reduce friction for genuine customers
- Lower manual review and operational costs
Key Features
Silent device intelligence & behavioural biometrics
Collects IP, user-agent, jailbreak status, VPN usage, and behavioural patterns without user interaction.
Silent email and phone checks
Verifies deliverability, tenure, and risk signals behind the scenes.
Risk-based decisioning
Combines fraud and KYC scores, applies custom thresholds, and surfaces clear recommendations.
Intrusive verification when risk is high
Triggers IDV, liveness, or OCR only for medium or high-risk users.
Rule-based risk engine
Configure risk thresholds and scorecards in the portal—no code required.
Unified risk score
Combines Fraud and KYC risk into a single assessment for smarter decisions.
What’s a Fraud Check?
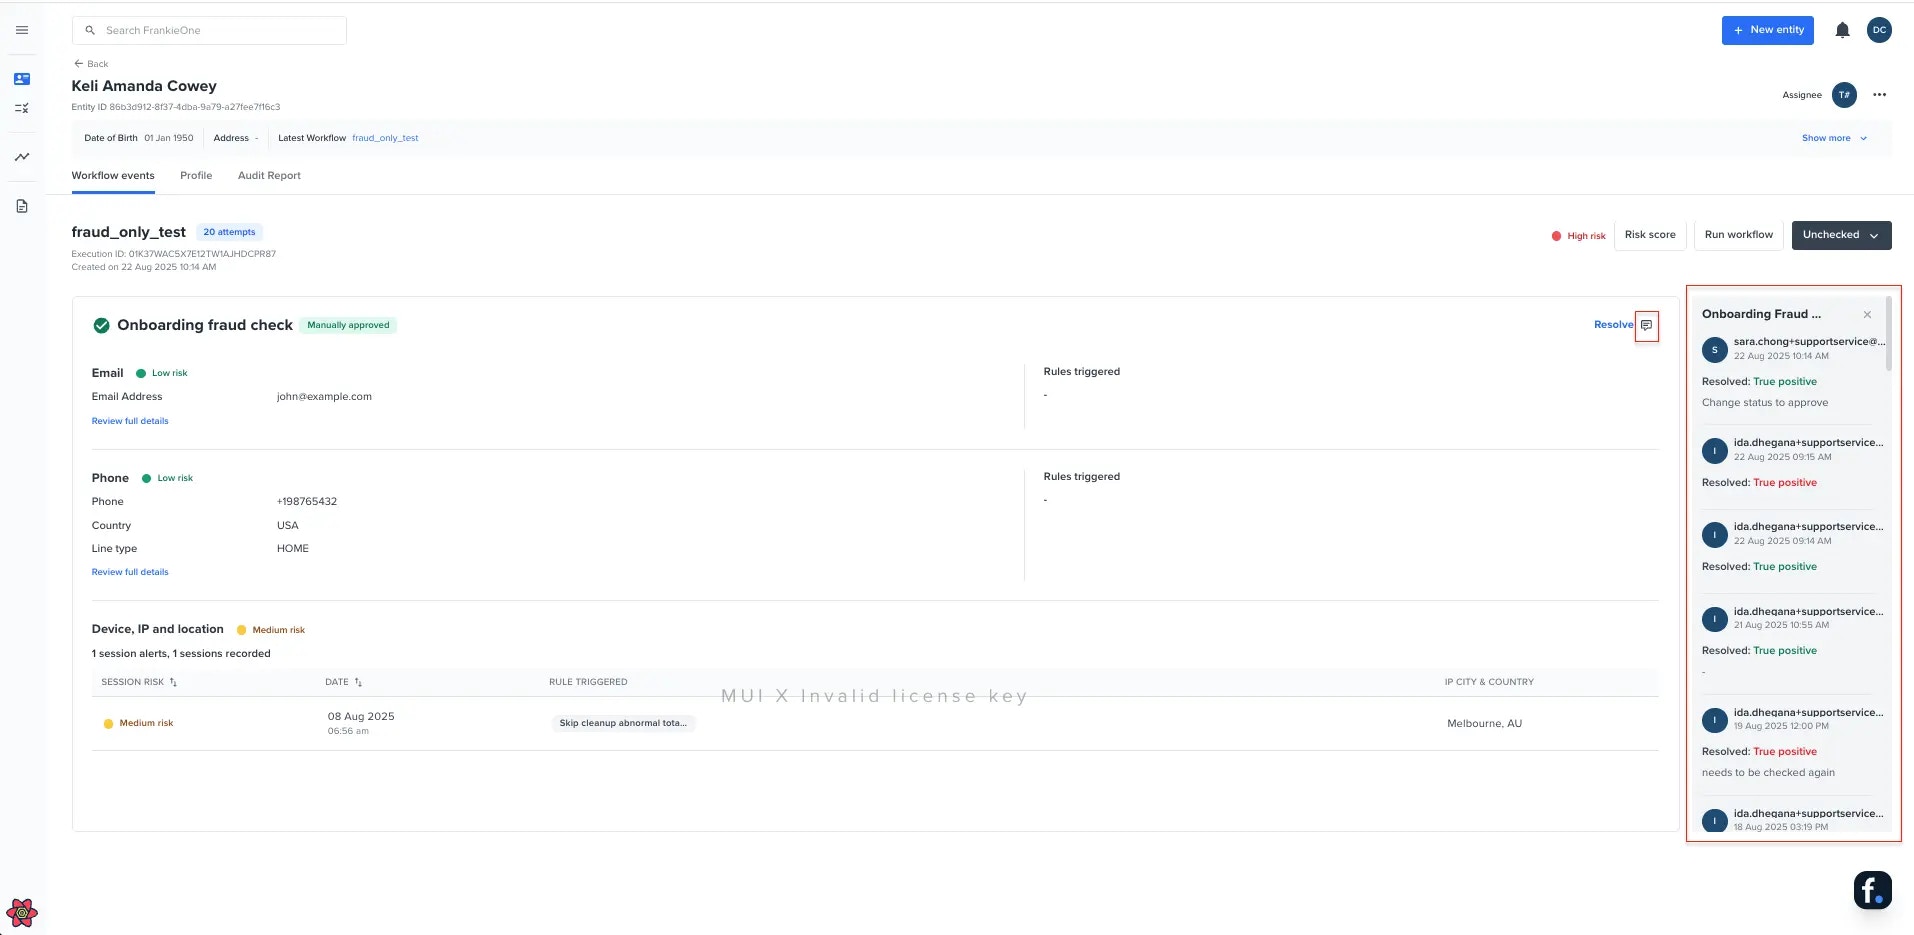
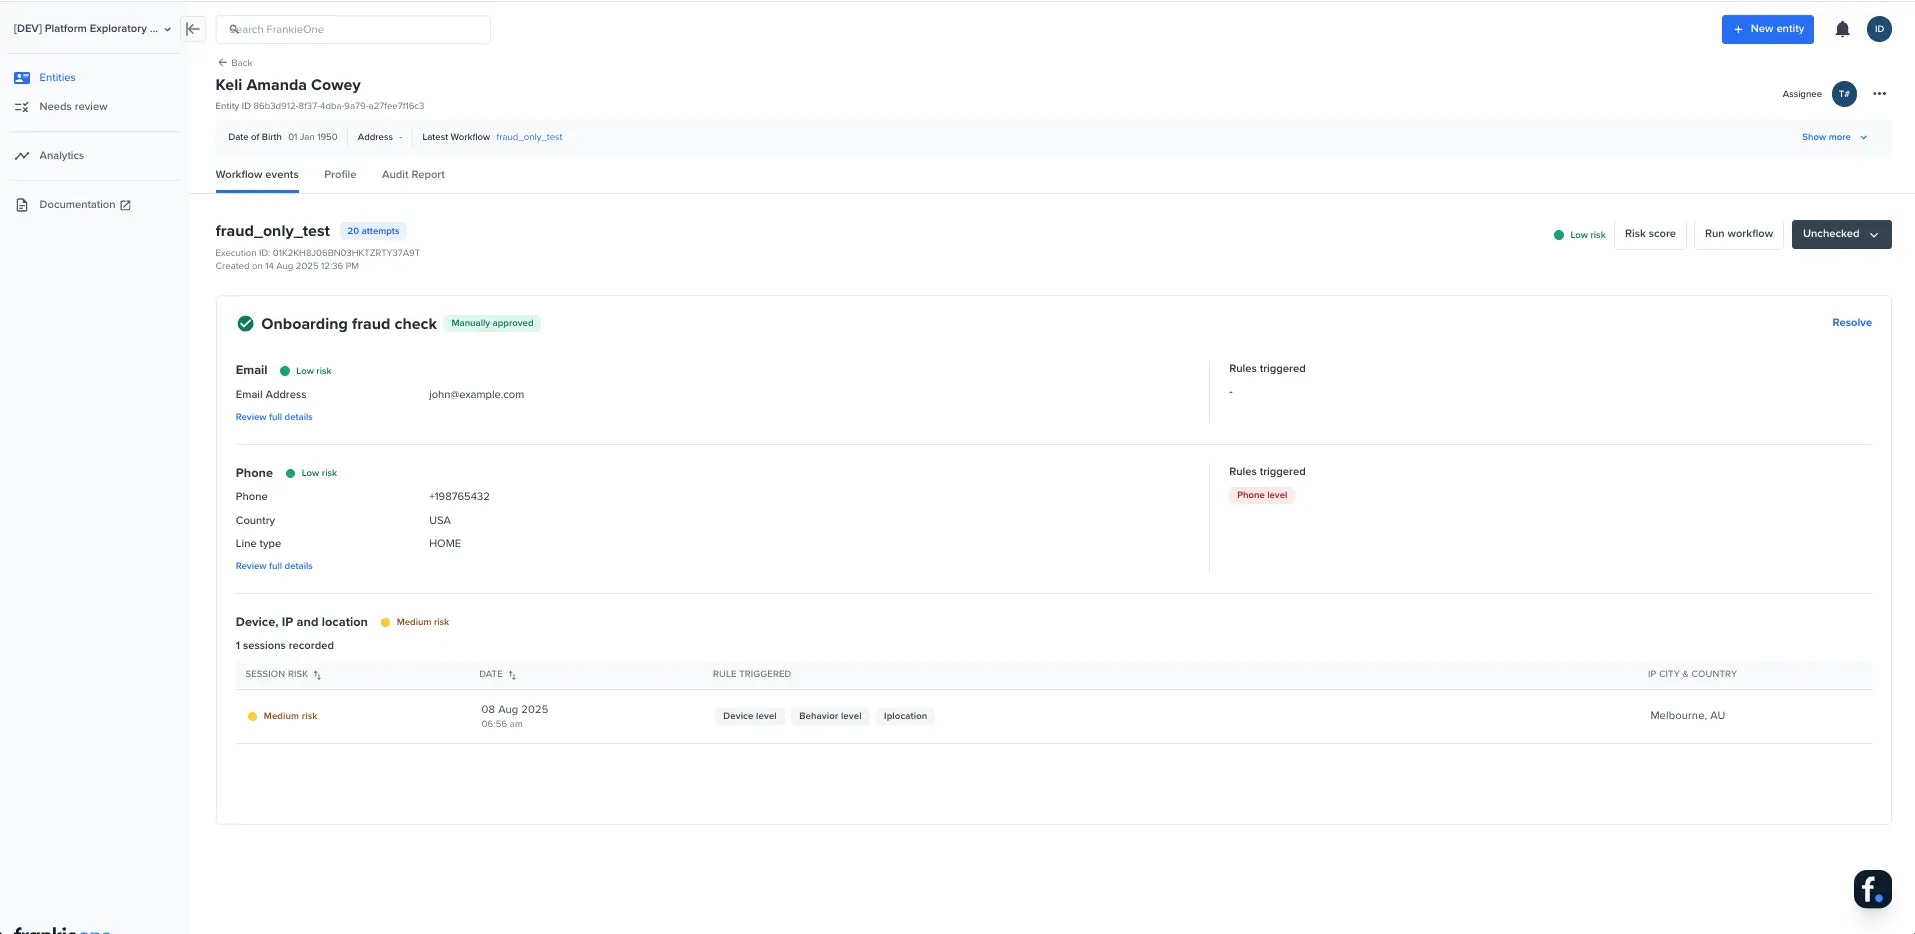
After the customer or entity has run the onboarding check, you can view any fraud-related issues in the workflow events tab. If there are any alerts found, these may include risks or issues related to email, phone, device, or IP checks. These alerts can be resolved individually.Reviewing Fraud Check Results
Filter the entities table with fraud as one of the selected issues. Selecting an entity that has fraud issues will take you to the entity view and show the workflow events tab with the onboarding fraud check result.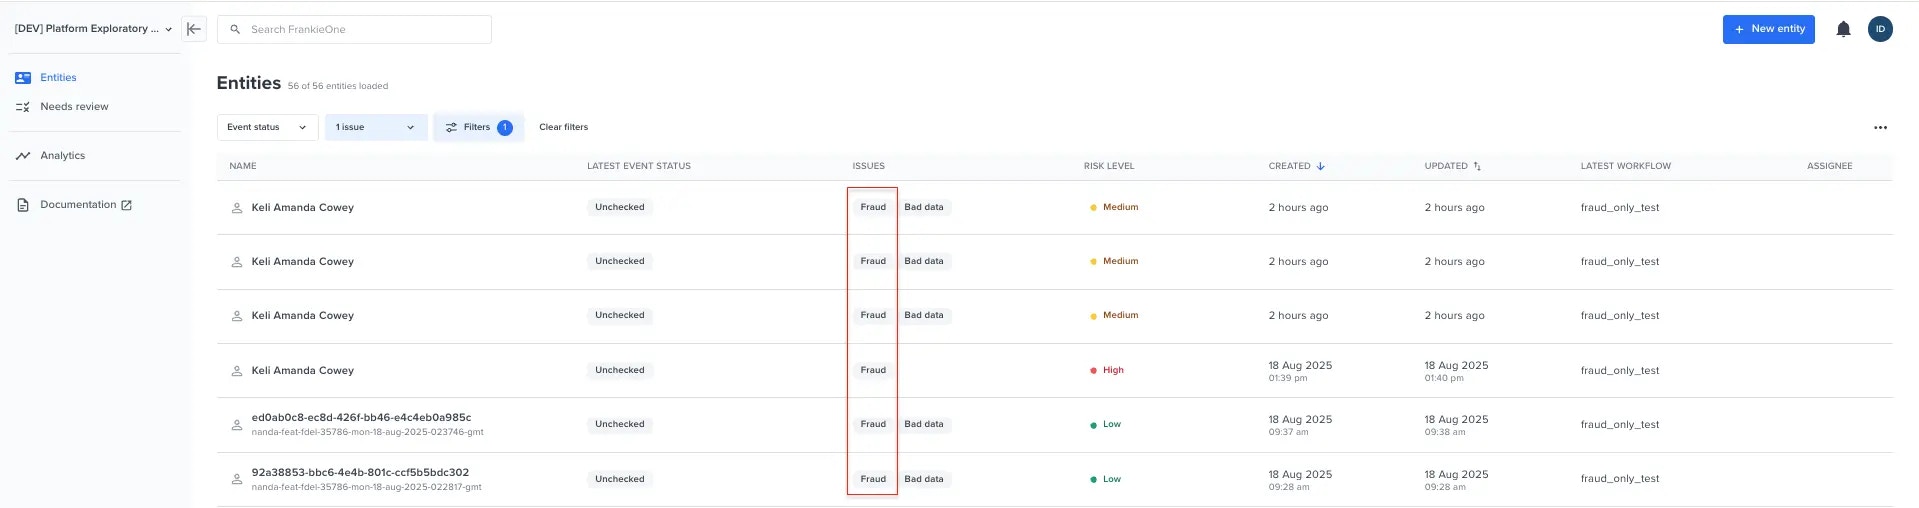
deviceId.
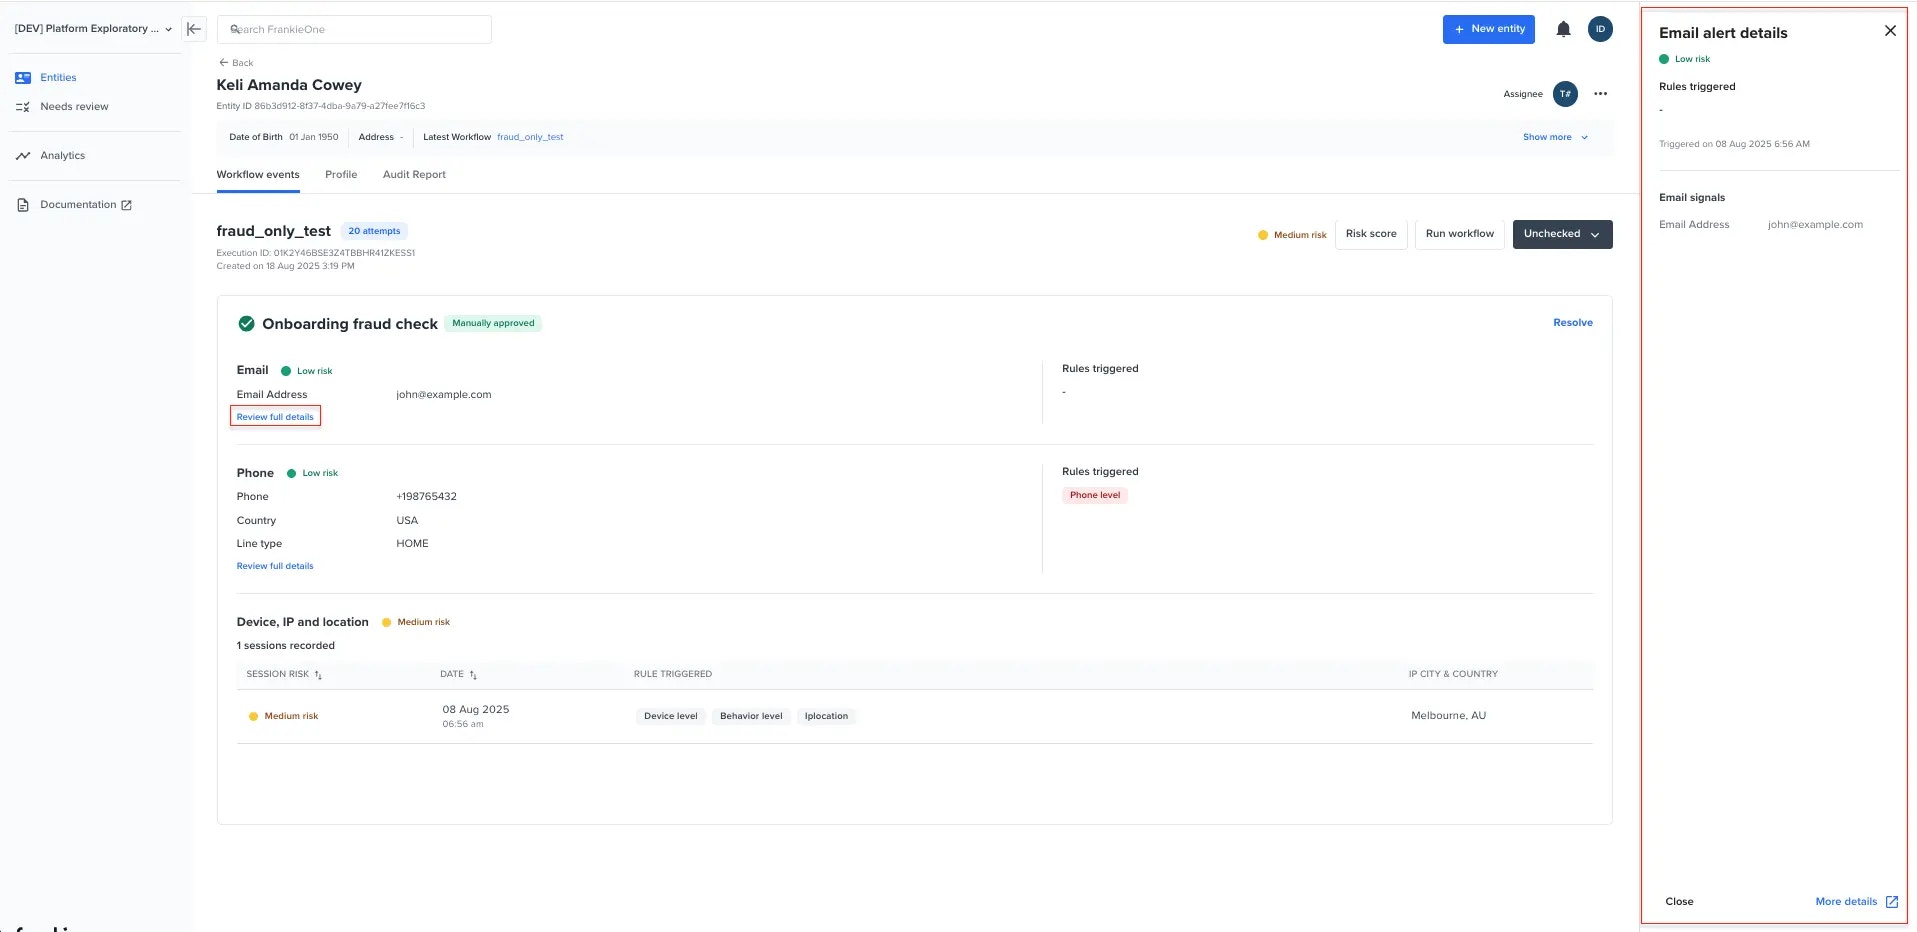
Fraud Check Details
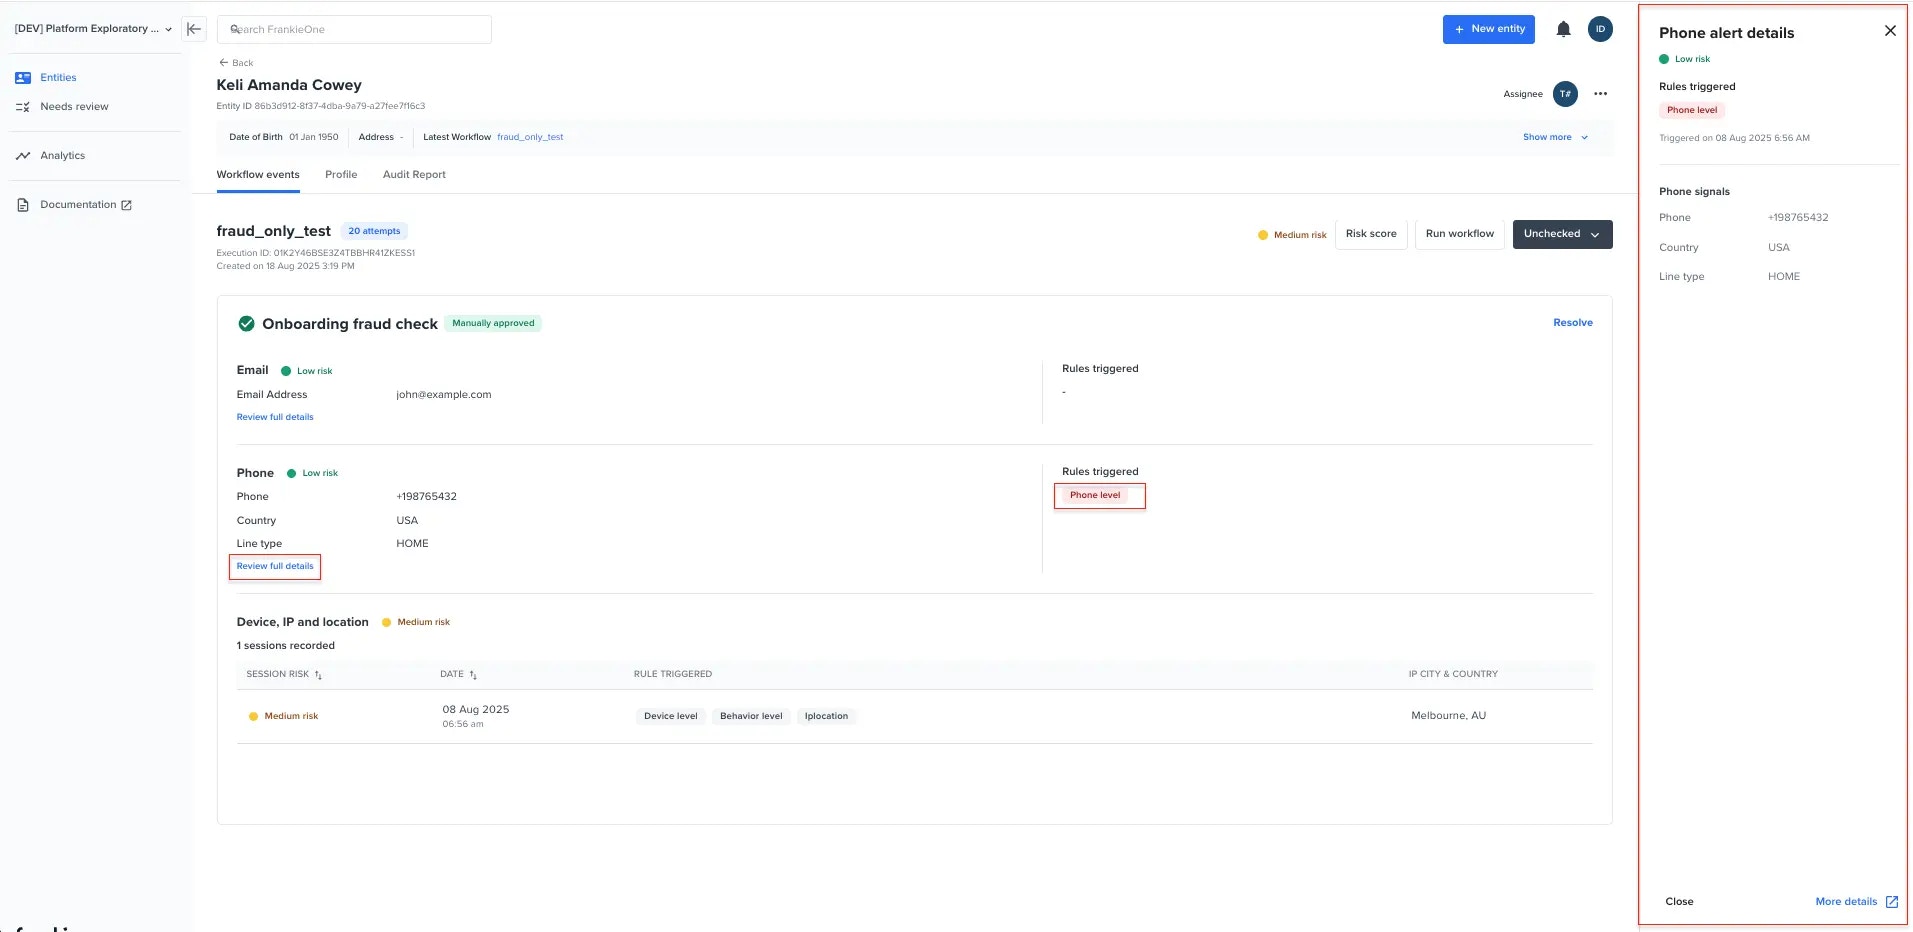
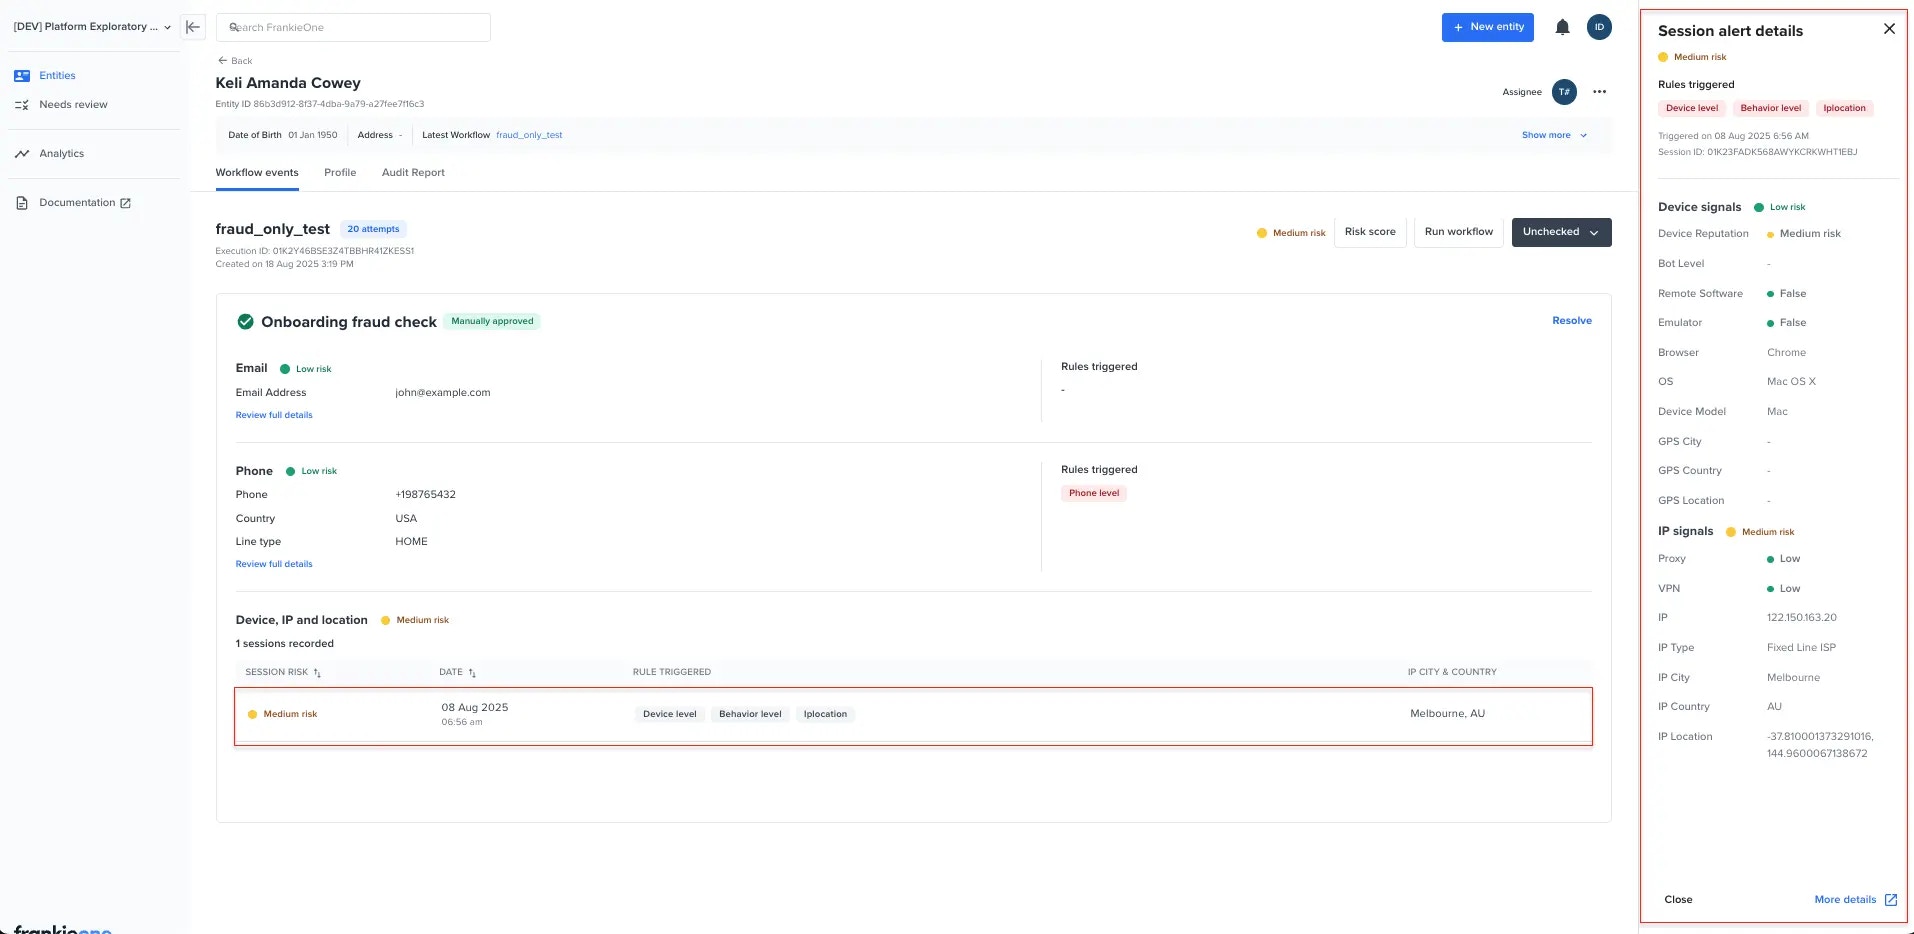
Visibility Requirement: The onboarding fraud checks are only visible if enabled on your account. To enable them, please reach out to your Frankie Account Manager. You can view the details by clicking on one of theReview full details, Rules triggered badges, or the table rows under the device & IP location. This will open a drawer with the content of the selected section.
Clicking on “more details” will redirect you to view the external link.
Email Section:
Phone Section:
Device & IP Section:
Resolving Fraud Check Issues
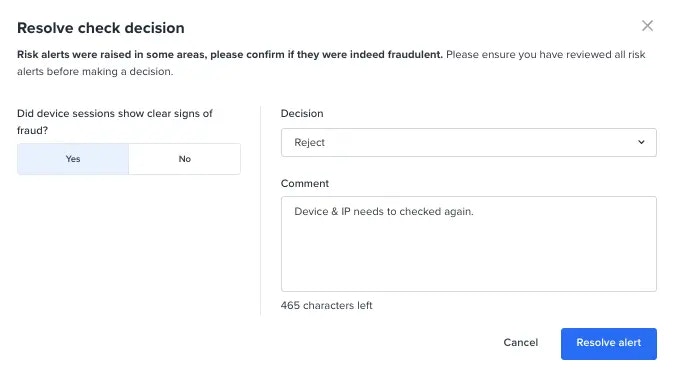
You can resolve issues by selecting the Resolve button on the right side of the onboarding fraud check container. There may be cases where the resolve button is not visible. This is because there are no PROs that need to be resolved, meaning the email, phone, device, and IP sections are all cleared and nothing needs to be resolved. If all of the checks need to be resolved, Selecting the Resolve link will open a modal. Decide whether to approve or reject and add a comment.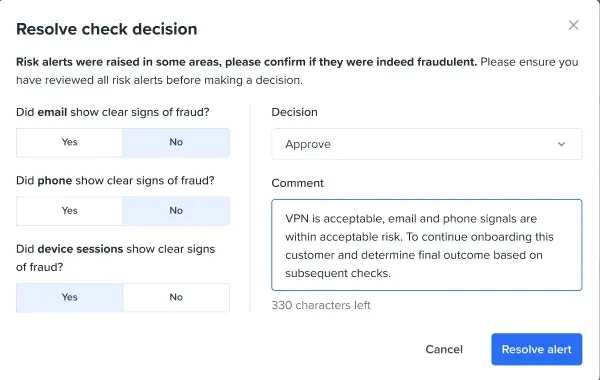

Manually approved beside the onboarding fraud check title.

Manually rejected beside the onboarding fraud check title.


Fraud Check Comments
If you click on the comment icon, it will open the comment history box on the right side to see all previous comments after you have resolved an issue.