The Entity view
The entity view shows the entity details, events, and checks that have been run on an entity and the result of each of these checks.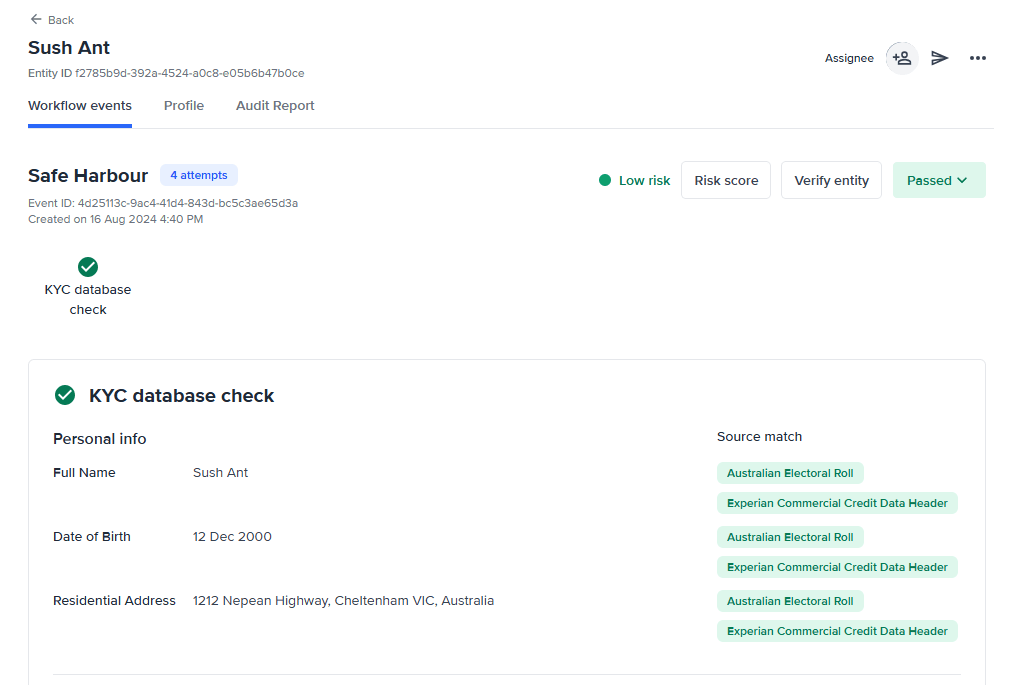
Video Guide
Entity Page UI walkthrough
Entity ID
Use the Entity ID found below the entity name on the Profile tab when speaking with our customer support team. The type and order of checks that have been run on a particular customer are defined in the Workflow assigned to that entity.Workflow events
The Workflow events tab displays all the relevant information related to the workflow assigned to the entity.Profile
The Profile tab provides the personal information, and identity documents collected during KYC.Audit Report
The Audit Report tab displays a record of all activity and status changes on the entity.Entity actions walkthrough
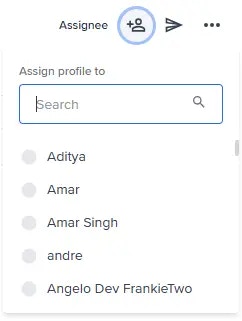
Assign a user to a profile
Video Guide
To assign a user to an entity, use the dropdown box in the top right corner.
View comments
To view comments on an entity, go to the Profile tab and select the Comments icon on the top right corner.Send a link
Use the Send link button to send an onboarding link to the end user. This will open the Send link via SMS modal where you can enter the details of the end user and send them a link to complete their onboarding.More button
The More button provides access to additional actions that can be performed on the selected entity. These actions allow operators to manage and maintain entity records beyond the standard review and verification workflows.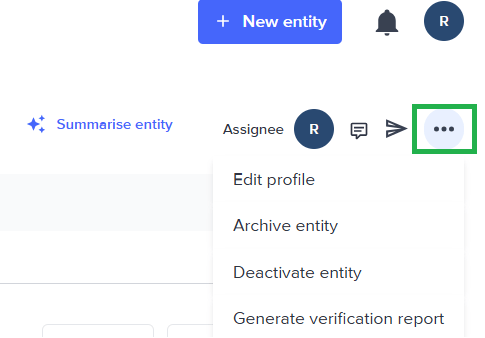
Edit profile
To edit the entity profile, select the More button and select Edit profile.Add blocklist
To add a blocklist to an entity, select the More button and select Add blocklist. This will open the Add blocklist modal where you can select the blocklist to add to the entity.Archive entity
In an Archive state, the selected entity record remains accessible but will no longer display on the default Entities page. We suggest using this when setting aside entities you are not actively working on, but may want to keep as a record. In an Archive state, the selected entity record remains accessible but will no longer display on the default Entities page. We suggest using this when setting aside entities you are not actively working on, but may want to keep as a record. To archive an entity, select the More button and select Archive entity. This will remove the entity from active usage but retain it in the system.You must have the “Create and edit entities” permission to carry out this action. See under Settings > Role management
Video Guide to Archive an entity
Deactivate entity
When an entity is deactivated, the system sets the entity status to Inactive. The selected entity record is permanently disabled and all associated indexes are removed from the system. We suggest using this when you no longer need an entity and do not intend to use it again in the future. To deactivate an entity, select the More button, select Deactivate entity. A confirmation dialog will appear, asking you to confirm the action. Once confirmed, the entity’s Service Profile status will be permanently set to INACTIVE.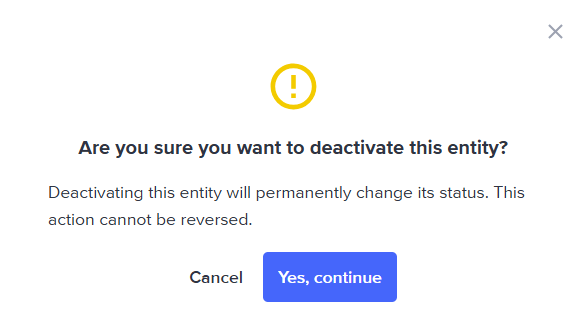
When to use Deactivate vs Archive
| Archive | Deactivate (Inactive) | |
|---|---|---|
| Entity still accessible? | Yes | Yes |
| Shown in default Entities page? | No | No |
| All indexes removed? | Yes | Yes |
| Suitable for? | Entities you’re not actively working on but may return to | Entities that are permanently no longer in use |